
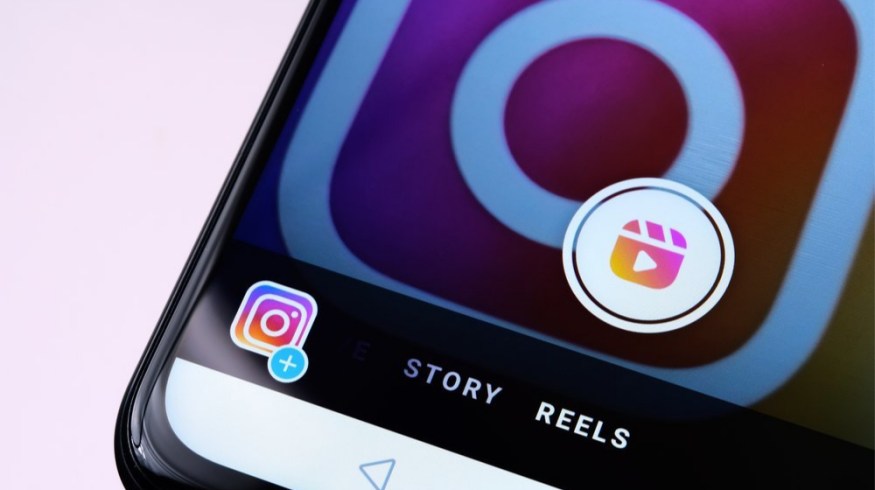
How to Upload 60-Second Videos to Instagram

Here are the steps to make, edit, and upload your videos to Instagram. Strengthen your social media presence now!
Instagram was designed as a mobile platform, and the app has gone through update after update to look like the app you now know and love. It’s designed for you to shoot and edit everything on your phone.
However, many video producers and advertisers want to create original content with a traditional camera setup and video edit. This allows them to capture the best footage, control the audio, and even add graphics.
With Instagram now allowing creators to upload from their desktop and offering different platforms for videos to be hosted on (Reels, Feed, Story), there are a few different ways you can approach exporting your video to give it its best life.
To upload to Instagram, the video file can either be on your phone or your computer. Due to recent updates and improvements with the app, you can now upload your video right to your feed from your desktop. This is big for editors who no longer have to transfer videos to their mobile devices.
But, before we talk about what to do with your video, let’s be sure you’re covering all the bases for exporting from your desired editing program.
Instagram Video Aspect Ratio
Okay, so what are the upload requirements for video? The requirements are as follows:
- You can upload a video with an aspect ratio between 1:1, 1.91:1, and 9:16.
- Videos should have a minimum frame rate of 30fps (frames per second) and a minimum resolution of 720 pixels.
- The maximum file size for videos that are ten minutes or less is 650Mb. The maximum file size for videos up to sixty minutes is 3.6GB.
Those of you with experience working with Instagram may remember that the canvas size was once 640 x 640. While that holds for mobile, Instagram can now be viewed from a desktop at a max size of 1080 x 1080.
A good rule of thumb is always to use at least a 1080 canvas. Instagram will automatically convert the footage for you, so it’s best to max out the size to get the best look. Speaking of, let me quickly go over the codec required by Meta (the owner of Instagram).
The video codec required (if you need this information) is as follows:
- Progressive scan (no interlacing)
- High profile
- Two consecutive B frames
- Closed GOP—GOP of half the frame rate
- CABAC
- Chroma sub-sampling: 4:2:0
Landscape (Traditional) vs. Vertical Video
The wider aspect ratio acts as a traditional video. Aspect ratios like 16:9 allow you to fit more information width-wise. Still, they’ll leave you cutting the composition by two-thirds to make the image vertical, which is more user-friendly for Instagram.
The downside of wider video is that you’ll not take up as much valuable retail space on a user’s phone. If you’re creating an advertisement, you’ll want to take as much screen space as possible. That’s why ads tend to use a vertical 9:16 ratio, as well as most TikToks and Reels you see on your feed.
Vertical Instagram Video
Let’s say you’ve been given horizontal footage, or you want to take footage from another project (that’s been shot horizontally). You want to post it on Instagram or have a vertical copy for your various social channels. In the tutorial above, Mike Maher shows us how to do this in all of the big NLEs.
Anything for Instagram Reels or TikTok should be vertical, in my opinion. The vertical aspect ratio is more user-friendly for Instagram, but it crops so much detail from the sides. This format is preferred because it allows you to add more large, legible text on screen. This is perfect for videos trying to educate you on a topic.
Think of all the quick-cooking recipe videos you see. The vertical aspect ratio gives you more room to write down the steps and recipe.
Once you decide which ratio suits your project best, you’ll know what canvas size you should set up in your NLE.
Editing Sequence Settings
The first step to editing a video for Instagram is setting up your sequence. Just make sure your final product is under sixty minutes, as that is the max time allowed by Instagram.
- For 16:9 – Edit your video normally as 1920 x 1080
- For 1:1 – Set your sequence to 1080 x 1080
Quick note: 1:1 will give you a perfectly square canvas. If you’re using 1920 x 1080 footage, watch the whole clip and ensure everything you need stays in the frame.
As a regular 16:9 video is still 1920 x 1080, the following steps will focus on creating 1:1 videos at 1080 x 1080.
1. Adobe Premiere Pro

- Click Sequence > Sequence Settings
- Change the Video Frame Size to 1080 x 1080 (1:1) / Leave at 1920 x 1080 for (16:9)
- Click OK
Now, edit your project as usual. Add any transitions, text, and graphics.

When you’re finished editing:
- Export the sequence
- Open Adobe Media Encoder and import the file you just created
- Open the Preset Browser
- Apply the 1080p preset for your device (Android, Apple, Mobile)
- Compress the video file (Note: This will always export a 1920 x 1080 file. That is not an issue.)
2. Final Cut Pro X

- Window > Project Properties (Command + J)
- In the Inspector window, click Modify Settings
- Change the Video Properties Format to Custom
- Change the Resolution to 1080 x 1080 (1:1) / Leave at 1920 x 1080 for (16:9)
Now edit your project as usual, including any transitions, text, and graphics.
When you’re finished editing, you have some options with Final Cut Pro X. You can Share to an Apple Device or Send to Compressor. In this case, using Compressor is overkill since we’re only using the video file on mobile. That said, you can still use Compressor if you want.

Share to an Apple Device:
- File > Share > Apple Devices 1080p (The Apple Device preset will work with some modern Android devices.)
- Click Share (Note: This will export a 1920 x 1080 file. That is not an issue.)
Upload from Your Desktop
As of this past fall (2021), Instagram has now updated its features to include uploading capabilities straight from your desktop. So, initially, this article only discussed how you could bring the video to your phone once you’ve edited it accordingly. That whole step is irrelevant now that you can go right to the source from whatever computer you’re working on!
Doing this is simple, you just click on the “upload” button on the Instagram site and then find the video file’s location on your computer.
Remember what we said earlier when listing the upload requirements: “The maximum file size for videos that are ten minutes or less is 650Mb. The maximum file size for videos up to sixty minutes is 3.6GB”.
Transfer to Mobile
When you upload to Instagram, you’ll choose Crop settings. No matter if you used a 16:9 or 1:1 ratio, the final compressed mobile video will be 1920 x 1080—this won’t be a problem. More on that later.
Now that you have a compressed Instagram mobile file, you can also transfer the file to your phone. The best option for Mac/iPhone users is to use Apple AirDrop.
For Mac/Android or PC/Mobile, you can use Google Drive or Dropbox programs. As a Mac/Android user, I prefer using Google Drive since it’s faster.
Apple AirDrop
Mac users with iPhones will find it easiest to send files using AirDrop. You’ll just drag the compressed Instagram video file to your iPhone. On your iPhone, you’ll now see the file under Photos.

- Open a Finder Window
- Click on AirDrop
- Drag and Drop the compressed Instagram video file to your iPhone
- On your iPhone, open Photos and verify the file transfer
Google Drive
Google Drive works for both Mac and PC and will transfer files to iPhone and Android phones. You’ll need both a Google Drive account on your computer and the Google Drive App on your phone.

- Sign in to your Google account and open Google Drive
- Drag and Drop the compressed Instagram video file
- Open the Google Drive app on your phone
- Download the compressed Instagram video file to your phone
- Open the Photos/Gallery app on your phone
- Verify the file is fully transferred
Dropbox
Dropbox works for both Mac and PC and will transfer files to iPhone, Android, and Windows phones. You’ll need a Dropbox account on your computer and the Dropbox App on your phone.

- Sign into your Dropbox account
- Drag and Drop the compressed Instagram video file
- Open the Dropbox App on your phone
- Download the compressed Instagram video file to your phone
- Open the Photos / Gallery app on your phone
- Verify the file is fully transferred
Upload to Instagram

We’ve finally made it. It’s time to open Instagram and upload the video.
- Open the Instagram app on your phone
- Tap on the Camera icon
- Go to the Gallery
- Select your Instagram video file
1:1 Aspect Ratio
Remember how your 1080 x 1080 1:1 video file was compressed down to a 1920 x 1080 video? Instagram will automatically crop out the excess black bars on the sides, and you’ll have a perfectly square video ready to share. The result is like the middle image above.
- Tap the blue arrow
- Add a filter if you’d like, change the cover image, and/or mute the video
- Tap the blue arrow
- Add a caption, hashtag, location, or send as a Direct message
- Tap the check mark, and you’re done
16:9 Aspect Ratio
Instagram defaults images and videos to 1:1. If you want a 16:9 aspect ratio like the right image above, you’ll need to adjust the crop.
- Tap the Crop button to change to 16:9 (or whatever format your video is in)
- Tap the blue arrow
- Add a filter if you’d like, change the cover image, and/or mute the video
- Tap the blue arrow
- Add a caption, hashtag, location, or send as a Direct message
- Tap the check mark, and you’re done
Uploading to Instagram Reels
Since Instagram Reels is arguably a more popular way to upload your videos than just straight to your feed, we can talk briefly about how to upload your videos to Reels.
The biggest talking point: The app allows you to shoot and edit your entire video all within the app. This will enable you to add text, music, and effects all from the app. How is this relevant to us? You can then save and post that video on your feed, as well.
So, in a big way, this gets rid of a lot of past editing apps and software you might need if you’re making social videos. The creation lives and “thrives” all on the same platform.
PremiumBeat is now on Instagram. Be sure to give us a follow.
For more tips, tricks, and advice, check out these articles:
- Best FREE Animation Software — Ready to Download Right Now
- How Blackmagic’s New Cloud Service Compares to Frame IO
- 14 Tips for Faster Rendering in After Effects
- ZBrush Added to Maxon One Subscription
- How to Create a Holographic Sticker Animation in After Effects
Cover image via Ascannio.


