Isolating Image Channels to Work with Chroma and Luma in Premiere
Mastering color correction means understanding the color channels that make a good image. Here’s how to isolate the chroma and luma channels in Premiere.
I’ve covered noise reduction somewhat extensively over the past few months. In my article on manual noise reduction in Resolve, we took a look at the powerful results you can get from isolating the chroma and luma channels to apply noise reduction to each.
Today, we’re going to learn how to isolate and work with image channels in Premiere — or any other similarly functional NLE. As with Resolve, there isn’t a plugin or button to quickly split your channels for you, so we’re going to do it manually.
Before we start, what is the point of splitting the component channels?
Each video clip is actually a blend of three distinct image channels. To put it simply, these component channels contain Luminance (or brightness and contrast) information, red color information, and blue color information. Baking these three channels into a single video stream enables much faster playback and simplicity of use.
It is always good to know how to break down anything into its component parts, so without further ado, it’s time to split . . .
Splitting Image Channels
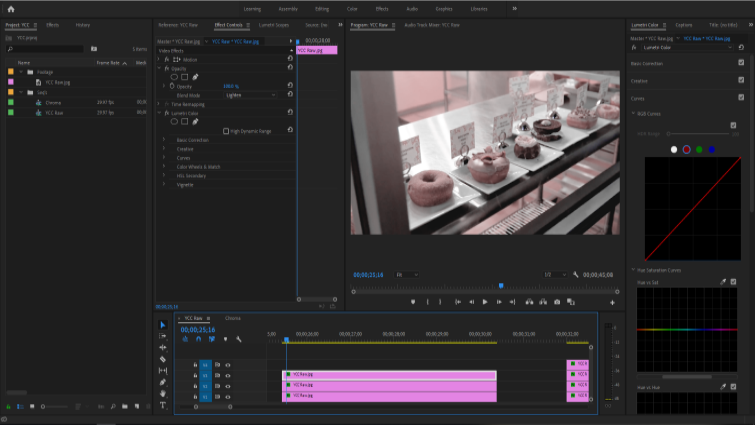
Underexposed Donuts! The first step after you load your clip into a timeline is to duplicate the clip. In Premiere, the default quick keys for duplicating clips are alt+left click for windows and option+left click on mac.
Separating Luminance
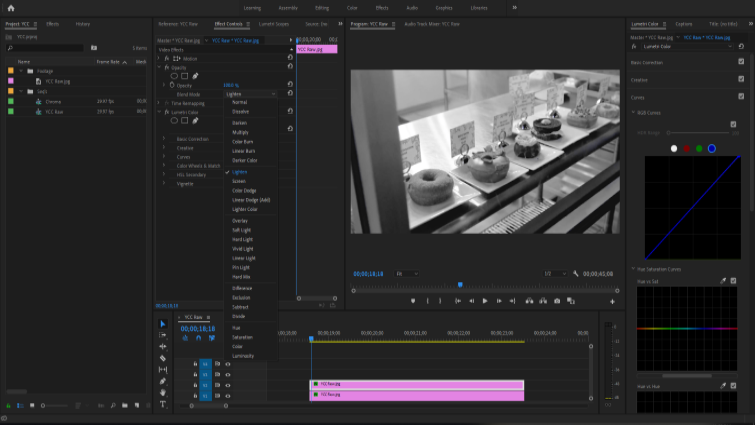
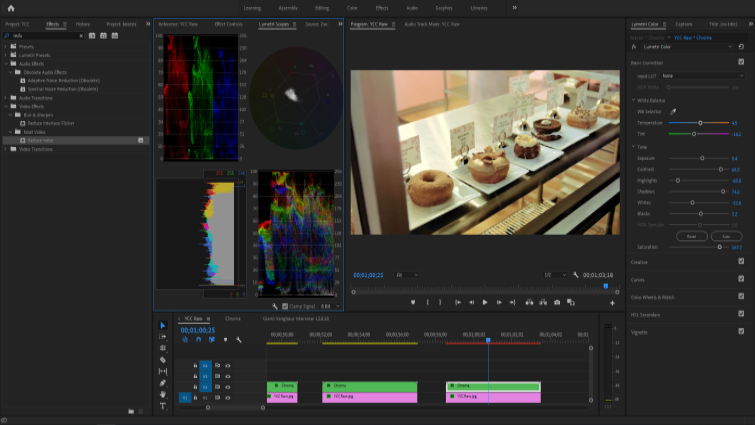
To pull the chroma information out of our luma channel, all we need to do is navigate to the Basic Correction tab in the Lumetri color panel and slide the saturation to 0%.
Separating Chroma Channels
Separating the chroma channels involves a few more steps. To start, duplicate your original (full-color) clip and place it above your luminance clip on the timeline. From here, navigate to the Curves tab in Lumetri and drag the top right point on all the curves (except for red) all the way to the bottom. Essentially, we’re cutting everything except for the red color in the shot.
Duplicate the original clip once more, and place it on top of your red and luma clips. Now repeat the curves adjustments, but this time, isolate the blue channel.
Now repeat the whole process once more for the green channel, placing it on top of everything.
Technically, there isn’t a green color channel in the original clip, but I usually find the best results by including it. Test using or excluding it for your own clips.
Now, go through each color layer and set its Opacity Blend mode to Lighten, but leave the opacity at 100%. (There are multiple blend modes and methods that will yield similar results, so experiment.)
Your footage channels are now separated out by luminance and color, and you should finally have a normal-looking image again.
Working with Split Channels
Now, let’s look at a couple of things we can do to improve our donuts a little more.
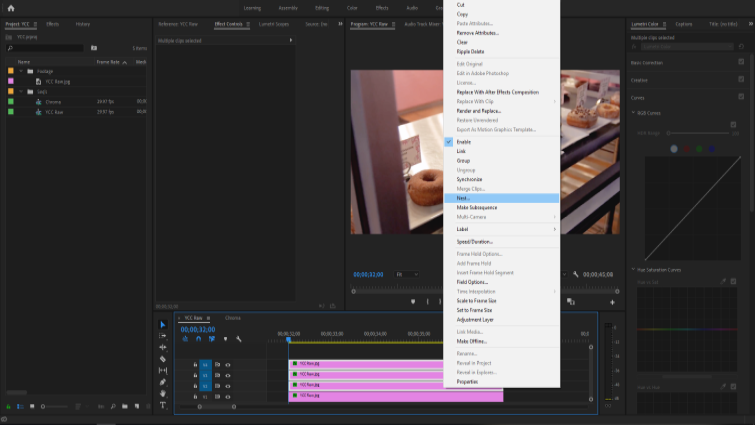
First, I’ll clean the timeline up a bit by nesting the three color channels. This is entirely optional, but I prefer previewing as few video layers as possible.
One of the most useful reasons to separate luma from chroma is for sharpening your clip. Because the luma channel determines how we perceive sharpness, we can sharpen it individually from the color info, resulting in a clearer image without a lot of the nastiness that comes from sharpening footage in the color channels.
But be careful not to go overboard — I’ve sharpened this clip by less than 20%.
Cleaning up Blockiness
On the window to the left of the donut, we can see some severe artifacting caused by bringing the levels up on this shot. Let’s fix that.
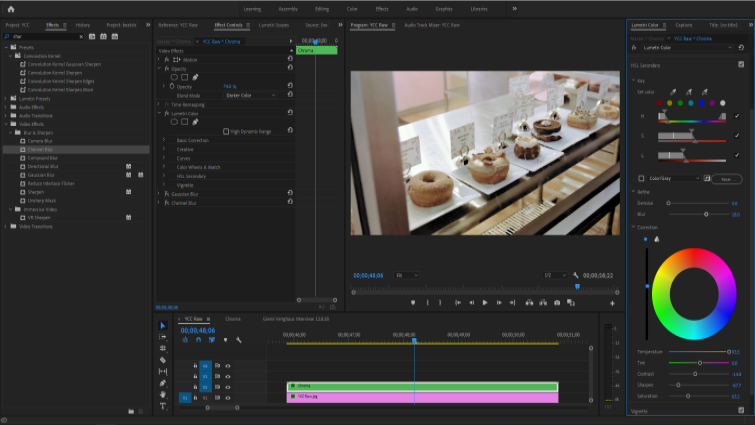
Select the chroma layer, and then head to the HSL/Secondary tab in Lumetri. Enable grey selection preview, and then find where the problematic blocking is by qualifying each channel.
I’m fairly happy with my selection, so I’m just doing some basic tweaks to reduce its visibility.
While we haven’t eliminated the blockiness entirely, we’ve pretty effectively covered it up. So let’s pull it out just a touch more.
Chroma Channel Noise Reduction
Now, we’ll apply Neat Video to the chroma layer and launch the plugin. I’ll do my best here to select this specific region of noise, despite Neat Video’s attempts to tell me that the region is too small. I usually shoot for 60% or greater selection quality, but here I was only able to get to about 45%, which should still work.
Now move into the Noise Filter Settings to preview and tweak the results. With a bit of (uncharacteristic) luck, I think I’m good with the default filter settings. So, I’ll commit the changes and return to Premiere to ensure everything looks good there.
I’ve tweaked the color on the results just a hair, and I think we’re looking great!
And that’s it! We have successfully split out our original footage into its component channels and brought the exposure to a much more appealing level while making the clip look even better than before.
So try this method out if you’re having trouble salvaging your underexposed clips. There is so much more that you can do with your image channels separated — load up some clips, and see for yourself.
Cover image via Simon Mayer.
Looking for more articles on post-production? Check these out.
- Post-Production Tip: Quick and Dirty Noise Reduction Without a Plugin
- How to Get Better Color Grades Using Opacity Blend Modes
- Improve Your Masks with Hue, Saturation, and Luminance Qualifiers
- Post-Production Tips: How to Save Corrupted Footage
- Understanding the Opacity Blend Modes in Adobe Premiere Pro


