6 Lifesaving Hacks for Cropping Your Footage to a Wider Aspect Ratio
This article will specifically look at the aspect ratios used in video and film, focusing on the two well-known aspect ratios of 16:9 and the wider 2.39:1.
Cropping your 16:9 footage to a wider aspect ratio can instantly add a cinematic look to your work. This is especially true if shooting on DSLRs and camera systems that don’t allow you to record footage at wider aspect ratios, such as 2.39:1 (or scope, as it’s sometimes referred to).
However, there are several things you should take into account when cropping your 16:9 footage to a wider aspect ratio. Use this resource as a guide for cropping your 16:9 footage the right way, saving yourself time and major headaches in post and delivery.
Brief Overview of Aspect Ratio
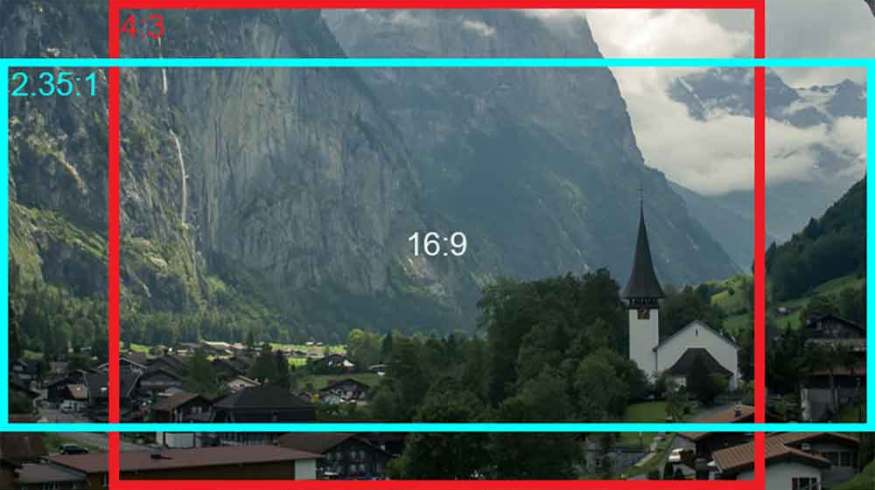
In the simplest of terms, an aspect ratio represents the dimensions of your frame. Numbers such as 3:2, 4:3, 1:1, and 16:9 are all standard aspect ratios in video and photography, each one representing the ratio between the width of your image and the height of your image.
Let’s begin with the standard aspect ratio of 16:9.
For footage that is shot in a 16:9 aspect ratio, your resolution will measure sixteen units in width and nine units in height. In other words, for every sixteen pixels of width, there’ll be a corresponding nine pixels of height. Take for example 1920 x 1080, which is one of the most well-known 16:9 resolutions. The width (1920) is evenly divisible by sixteen. The height (1080) is also evenly divisible by nine. Therefore, the 1920 x 1080 resolution is in the 16:9 aspect ratio.
You can scale 1920 x 1080 down to 1280 x 720 (HD-720p), or scale it up to 3840 x 2160 (UHD-4K) and beyond, and the 16:9 aspect ratio will always remain constant.
1. Choosing the Right Aspect Ratio for Your Project
Television, web-based content, and many documentary films use the standard 16:9 aspect ratio. It was originally created as a compromise between 4:3, which was the old standard aspect ratio for broadcast, and 2.35:1 (or CinemaScope), which was the standard aspect ratio for films destined for a theatrical release.

Today, filmmakers and content creators have the flexibility to choose between the standard 16:9 aspect ratio, or a plethora of wider aspect ratios including 2.35:1 or the more common 2.39:1. Generally speaking, a wider aspect ratio creates a more cinematic look in your images. For example, let’s compare the two shots below. Which one looks more “cinematic” to you?


Images via Bud Simpson
Filmmakers began using the wider CinemaScope aspect ratios to more accurately create what the human eye perceives.
Be sure to check out these excellent PremiumBeat resources on choosing the right aspect ratio for your project:
- Choosing Aspect Ratio: A Guide to Everything You Need to Know
- Aspect Ratio Explained: When to Use the Major Three
2. Choose Your Aspect Ratio Long Before You Begin Shooting
Professional camera systems such as RED and the ARRI Alexa series offer recording in aspect ratios wider than 16:9, such as 2.39:1 (or scope). However, most DSLRs and prosumer cameras offer few choices in aspect ratio other than 16:9.
So, let’s say for a particular project, your budget constraints force you to shoot on a DSLR or mirrorless camera. However, you and your director decided that this content is destined for theatrical release and would be best suited to a wider aspect ratio. How do you achieve the cinematic look of a wider aspect ratio, if you’re forced to shoot 16:9?
The strategy is to shoot at 16:9, then crop the top and bottom of your footage in your editing software.
There are several things you should take into account when cropping your 16:9 footage to a wider aspect ratio. First and foremost, the decision to deliver your project in a wider aspect ratio should be made in pre-production — not in the editing room, after you’ve already shot your footage.
Your framing influences shot composition, lensing choices, storyboards, and even production design. Therefore, make the decision to shoot wide and crop before you start shooting. Furthermore, communicate this decision with other department heads, such as production design. The decision to deliver in a wider aspect ratio should never be made in post-production, after you’ve shot your footage. This will result in composition flaws — such as reduced headroom — and can create a claustrophobic effect in your images.
3. Lens Your Project Slightly Wider to Account for Lost Headroom
It’s also important to consider lensing when planning to crop your 16:9 footage to 2.39:1.
In general, shooting at a slightly wider focal length will produce a more pleasing image, and will help in determining headroom for your subjects. Shooting at wider focal lengths will also accentuate the immersive quality of shooting in scope. Take, for example, this iconic shot below from David Lean’s Lawrence of Arabia (Freddie Young, DP). When cropping your 16:9 to 2.39:1, it’s a good idea to keep your field of view wider than 35mm. However, there are of course exceptions to this rule.

Lawrence of Arabia via Movie Screencaps.com
4. Shoot in 16:9 — Use Guides and Overlays to Compose Your Shots
So, you’ve made the decision to shoot in a wider aspect ratio. You’ve also made the decision to lens your project slightly wider than you normally would. This is to account for the pixels you’ll lose at the top and bottom of your image when you crop in post. So, how do you compose your shots while shooting in 16:9?
Most DSLRs, mirrorless cameras, and external monitors offer some sort of onscreen guide to help you compose your shots. Here’s an example of the overlays that come standard with the Blackmagic Video Assist monitor:

Image via Bud Simpson
TIP: If your camera or monitor doesn’t have guides or overlays, tape two thin strips of gaffer tape over your LCD screen to approximate the crop. This hack works in a pinch, and can always be fine tuned in the edit.
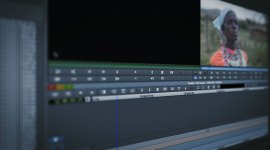
5. Use PNG Overlays During Your Edit — Crop Your Footage for the Final Output
You’ve shot your footage. Now, it’s time to ingest your media into your editing software and crop it to a wider aspect ratio.
You accomplish this with PNG overlays. These overlays are simply images of black bars placed at the top and bottom of your frame. The overlays are designed to crop a 16:9 image to that of a wider aspect ratio. These work in the same way as the framing guides that you used on your camera or external monitor.
To begin, you’ll need to find and download the appropriate aspect ratio overlays. You can download a set of overlays here.
Once downloaded, select the appropriate crop for your project. Import this into your editing software, and place it onto the topmost video layer in your sequence. Once in place, lock the layer and edit your sequence as you normally would. By utilizing these transparent overlays, you’ll be able to see what your final output will look like after you crop it.
If you composed your shots correctly during the shoot, there’s no need to make adjustments. However, you can reframe your subject along the vertical axis, if need be. If you’re shooting 4K and delivering at 1080p, you can also scale your image up and make adjustments along the horizontal axis, as well.
6. Turn Off Your Overlay Video Layer and Crop Your Image Using Export Settings
Once your project is complete, it’s time to export.
Before exporting, be sure to turn off your PNG overlay layer.
Next, navigate to File > Export. In the Export Settings dialog box, select the Source tab, and hit the Crop button at the top-left corner of the dialog box.
Check out this video to learn how to properly crop your footage and prepare it for output.
To recap, here are the six things you should take into account when cropping your 16:9 footage to a wider aspect ratio:
- Make the decision to use a wider aspect ratio in pre-production — not on a whim in the editing room.
- Communicate this decision with other department heads (such as the director, storyboard artist, production designer, etc).
- Lens your project slightly wider than normal to account for lost pixels at the top and bottom of your image when cropping.
- Take the guesswork out of framing and use your monitor’s framing guides to compose your shots.
- Use PNG overlays in your editing software to see what your final output will look like.
- When ready to export, turn off the PNG overlays layer and crop your footage using your editing software’s export settings.
Interested in the tracks we used to make this video?
- “Be Big” by Reaktor Productions from PremiumBeat.com
- “Influencerz” by Eternity Bro from PremiumBeat.com
- “Trouble Always Comes” by Grace Mesa from PremiumBeat.com
- “Night Owl” by Waxwing Music from PremiumBeat.com
For more information about utilizing wider aspect ratios, be sure to check out these PremiumBeat resources: