

DIY: How to DIY a Green Screen on a Budget

With tips on setting, lighting, and more, learn how to create your own green screen background—without breaking the bank.
Most of Hollywood’s big-budget action, fantasy, and sci-fi films rely on the humble green screen (although that’s starting to change thanks to the use of virtual production). However, Hollywood green screens are anything but humble.
From giant cyclorama sets to full-body green-screen suits, most scenes in these films come to life in post-production with the help of advanced green screen techniques.
Many filmmakers are eager to achieve the same effects, but it requires a thorough understanding of green-screen sets and chroma keying. For everything on this topic, check out our guide to green screen.

The good news is that you don’t need a huge budget or complicated equipment to create a green screen set with convincing results. Whether you’re on a shoestring budget or just in a bind, there are several ways to DIY a green screen setup.
We’ve put together a list of creative solutions for the green screen backdrop and how to light it.
Affordable Green Screen Kits
Before we dive into the DIY setups, it’s worth mentioning that simple green screen kits are cheaper than ever. The “YouTube” green screen kits were not available when I was in college, so I frequently had to head down the DIY route.
The truth is, these modern kits will be better than most DIY setups. They’re usually priced around $100 or less. If you already know you want a kit, or we just convinced you to get one, check out our breakdown of the best green screen kits on the market (for every type of user). We’ll list a few options below, too.
Also, ideally, working with a green screen is just like any other aspect of filmmaking. The more you’re immersed in the world of lighting and keying, the more you gain an understanding of what you need.
So, that being said, let’s get to it. Someday, we’ll all be creating things that look like this.
The YouTube Kit
Green screen setups—like this Emart kit—are what I commonly refer to as “YouTube Kits.” These kits are popular with entry-level YouTubers or anyone who wants a simple, all-inclusive kit to get the job done.
Are these kits going to be top-notch quality? Nope. But, compared to most DIY setups, they’ll be cheaper and more effective.
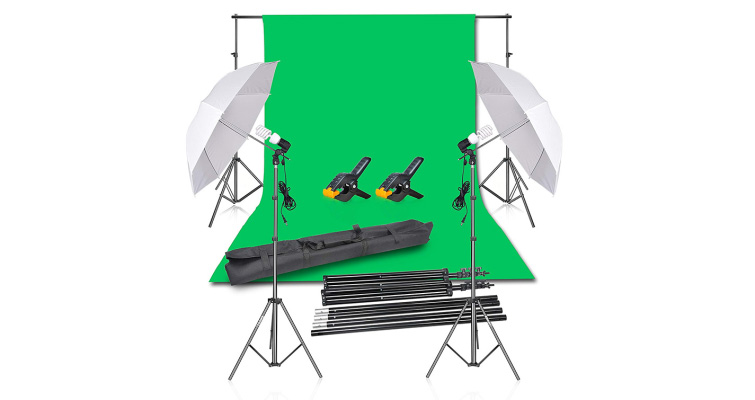
Many of these kits include the following: backdrop stands and support bar, green screen cloth backdrop, lights with stands, light diffusion, clamps, and a carrying case. For the price, these kits are tough to beat. A standard roll of seamless background paper can often cost more than these kits.
Popup Green Screen
Portable “pop-up” green screens—like this one from Fancierstudio—can provide fantastic results. This is the type of green screen I frequently use due to its simplicity.
Because of the collapsible pop-up design, the fabric becomes taut when expanded, creating little-to-no wrinkles on the backdrop. This makes keying out the green screen in post-production much more effortless.
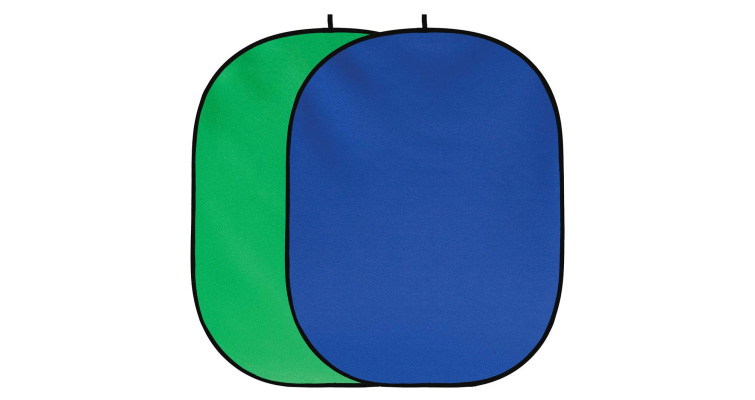
Pop-up backdrops are usually dual-sided, with one side being green and the other blue. They typically cost around $40.
One more thing with these, you can even have it in weird, unconventional angles and spaces in your shot just by clamping it onto a C-stand arm with one of these.
DIY Green Screens
Now that we’ve seen how affordable modern green screen kits can be, let’s explore some DIY options. For these DIY options, the idea is to create a green screen solution that costs even less than the kits available.
In some cases, we’ll look at what free options are available. When building a green screen for less than $100 (or even $40), you need to think creatively. In the following sections, we’ll cover every part of a standard DIY green screen kit, including the following:
- Green screen backgrounds
- Lighting
- Mounting and stands
DIY Green Screen Backgrounds
Fabric from Craft Stores
A fabric backdrop is your best bet for a DIY green screen. You have to figure out the exact dimensions you need from whatever size the space you’re working from requires.
Craft stores will usually have large rolls of solid green and blue fabric you can choose from and cut to your specifications. Buying fabric this way is relatively affordable, too.
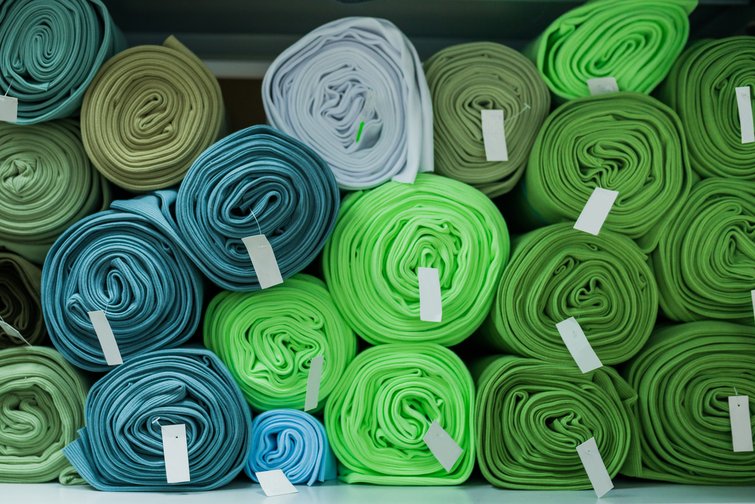
As you browse for fabric, keep an eye out for the type of material. Heavy fabric will hang nicely and provide solid coverage. But it’ll also be more prone to creasing and wrinkles. Light, stretchy fabrics resist wrinkles well, but they might not offer the same coverage as heavier materials.
Avoid shiny fabrics like polyester satins, as they’ll reflect light and create unwanted “hot spots” on your background. Sometimes these types of fabric will look okay to the naked eye, but will end up unusable when you pull your footage up in post-production.
Be prepared to iron or steam out any wrinkles and creases on the fabric. It must be completely smooth and wrinkle-free to ensure the best key possible.
You’ll also need to figure out a method to hang the fabric. We’ll touch on this later, but some common solutions include hanging nails, large thumbtacks, or using a line and clothespins.
Colored Foam Poster Board
Another thing you can find at craft stores is a colored foam poster board. You can usually find these in blue and green colors, as well. They probably won’t be large enough for a person to stand in front of, but they’ll work fine if you’re filming items on a table from above.
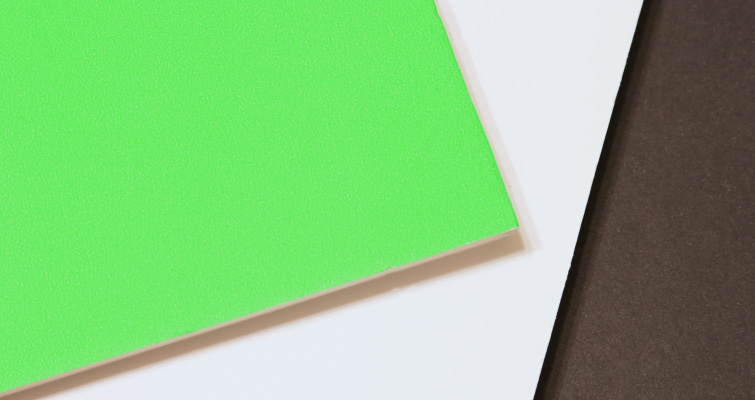
Avoid any poster board with a glossy surface, as it’ll probably reflect too much light and be difficult to key in post. I also don’t recommend using multiple pieces of poster board together to create a large backdrop because there will be seams where the panels meet. However, in a pinch, you may be able to make it work. It’ll just require more work in post-production.
Poster board is a nice option when you need to key out smaller areas of a shot, like a TV or a monitor screen. You can easily cut the board to size and position it without fussing with fabrics.
If you’re wondering how you’d go about keying out that small specific area, look no further!
One little trick from the video above is just pulling up a green screen on your phone or computer screen and turning the brightness up. Talk about an excellent way to save money.
Solid-Colored Walls
If you have a free-standing flat or a spare wall available, you can paint it green or blue to achieve an easy DIY green screen. This is also a viable option for floors so that you can create an entire green screen set.
The wall or floor must be smooth and flat, and the paint you choose must be a matte or matte enamel finish. Matte paints won’t reflect any light, but they’re hard to clean. Matte enamels are a bit glossier and, therefore, more reflective, but they’re easier to clean and more durable. That’s why it’s the paint you typically see in bathrooms. When picking a color, opt for bright, light greens and blues.
If you want to learn how you can build a flat for yourself and paint it green, check out the tutorial below, where we actually just built a set using flats. Check it out!
If necessary, you can use a plain, solid-color wall as your key background without painting it. Ideally, it’ll be an interior wall that’s smooth and isn’t too close in color to skin tones.
The wall color doesn’t have to be green or blue. Those colors are simply ideal for keying in post because they’re the farthest away from skin tone colors. You can use any color as a key—obviously, some more effectively than others. Experiment with this, but it’s likely a last-resort solution.
DIY Lighting
When it comes time to light the scene, regardless of the type of composition, there are a few different factors to consider and be aware of when it comes time to hit record.
In this breakdown from Rubidium Wu, we see a few crucial steps to consider along the way when lighting.
So, to break this down in an even more straightforward way, let’s look at the key points.
- Keep your green screen and your subject at least six feet apart.
- RGB-capable LEDs can light with green; you’ll get the correct exposure with much less brightness and, as a result, have less spill.
- You need a 30-40% brightness green screen for a clean key.
- If you can, shoot in RAW.
OK, now that we know a bit about lighting in a studio, let’s look at a few options for lighting in different scenarios.
Filming Outside
The best DIY lighting for green screens that I can recommend is free—just film outside. I do this all the time with a pop-up green screen I mounted on a C-stand. This is effective. Just be mindful of your shadow, as well as anything around you casting an unwanted shadow behind you. Also, be mindful of the wind!
Filming in mid-day will provide plenty of light, and the shadows should fall below your subject, not on the green screen.

You can easily adjust the angles of your background and subject if shadows become an issue. Also, if it’s a cloudy day, it’ll diffuse the sunlight, reducing the shadows even more. If you’re a filmmaker on a budget, I can’t recommend this solution enough!
Work Lights
The most common solution for cheap lighting is construction work lights. You’ve probably seen these before. They’re usually dual lights mounted on a bright orange stand.
I don’t recommend lighting your subject with these lights, as they’re very harsh. But they work for lighting up your background. These 2,500 watt Woods Twin Head Work Lights are a classic example.
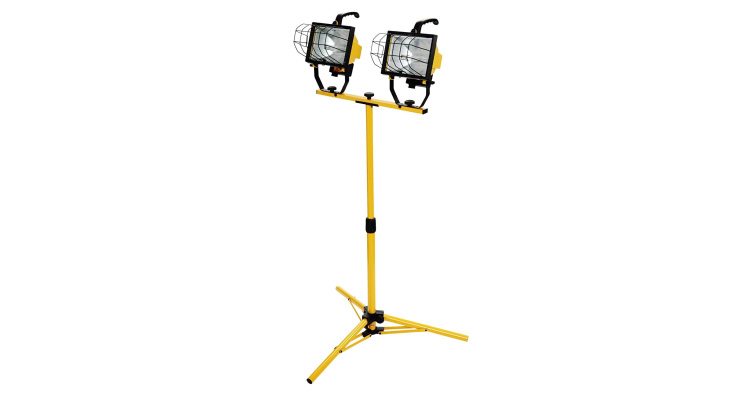
A word of caution, though: If you decide to use lights like this, be very careful. Work lights are designed for raw-lighting power, which can get extremely hot and easily burn you. Be sure to use heat-resistant gloves when working with them.
I don’t think they’re worth the trouble (compared to the YouTube green screen kits or just filming outside). But if you’re in a pinch budget-wise, or have some available to you, you know they’re an option now.
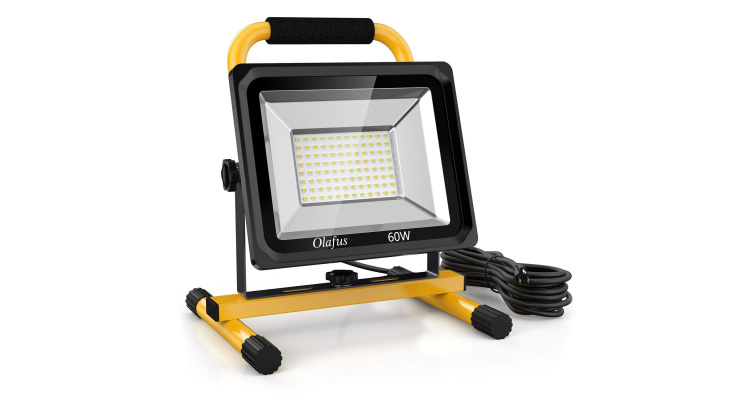
Alternatively, you might want to look for LED work lights—like this Olafus Work Light. Since they use LEDs, they won’t generate as much heat, and they’re likely safer to operate.
DIY Mounting and Stands
Clothesline and Clothespins
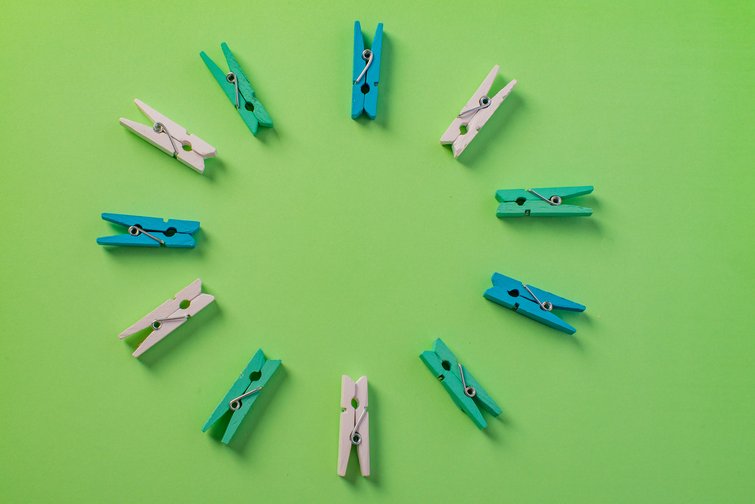
Whether mounting your backdrop inside or outside, using a clothesline and clothespins is the easiest and cheapest method. Simply toss the fabric backdrop over the line, then secure it with the clothespins.
You may want to hang clothespins or spring clamps off the bottom of the fabric to keep it taut and wrinkle-free. Remember that these C-47s can’t hold anything too heavy, so I’d go with the spring clamps if you want to ensure your green screen doesn’t fall in the middle of the shot.
Wire Nails or Thumb Tacks

If you’re hanging a fabric backdrop on a wall indoors (and you want to minimize impact to the wall), use wire nails or large thumbtacks to hang the backdrop. These should hold the fabric well, and the size of the holes left in the wall won’t be noticeable.
You can pick up a pack of these for a few dollars. Again, make sure the fabric is taut to prevent wrinkles.
3M Hanging Strips
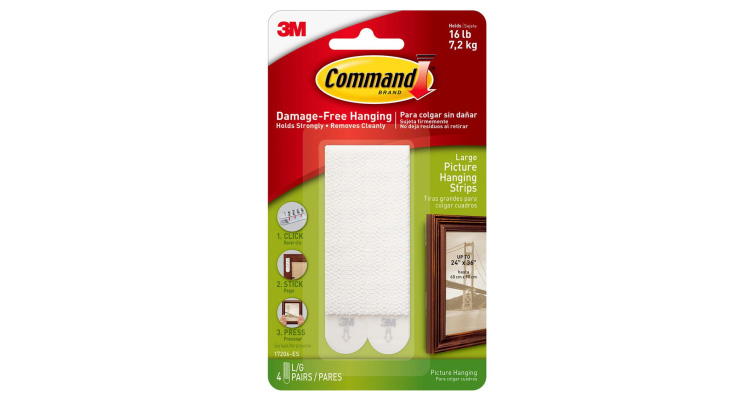
3M Hanging Strips are perfect if you’re mounting poster board to a wall. They’re designed to hold up picture frames, and you can easily remove them from the wall with no damage. Some even have hooks, which you could use as an alternative to nails if you’re hanging a fabric backdrop.
The obvious warning I have to give is using this while on set and on-location because I’ve had a few instances where a small bit of paint was ripped from the wall. So, maybe this option might be best for at-home types of productions. I’m just trying to look out for you!
Hang to Your Ceiling
In this brief little DIY gem I found on YouTube, you can use two cup hooks, two spring claps, some rope, and a green screen. You can simply pull it up to the top and tie it off to stay put.
This method is cheap and allows you to bypass buying C-stands if it’s not in your budget. This is also a nice way to have your green screen always set up instead of having to break it down every time you finish a shot.
Use What You Have
When it comes to stands to hang things from, use what you have available. (But, do it safely, of course.) You can use coat racks, doors, or door jambs to hang or drape a background.
And, if you’re outdoors, you can always tie a line between two small trees, fence posts, carport poles, etc.
Here’s a few past articles that will help you learn how to master the art of the green screen:


