How to Make a Portable Voiceover Studio with No Computer
This budget audio recording setup can easily be stuffed in a backpack and deployed anywhere. Here’s how to make one for yourself.
After realizing I needed to do a voiceover on a personal project, I discovered that clean recording audio at my desk wasn’t an option. There was too much going on around my workspace.
So, I rummaged my closet looking for gear that could help, and devised the perfect impromptu setup, which didn’t rely on a computer to record.
I can’t believe I didn’t think of it sooner. The equipment wasn’t the “best,” but it was convenient, easy to lug around, and even easier to set up and export to my project.
It also didn’t cost me a cent since it was made from stuff I had lying around. But, it’s affordable if you want to build your own.
Here’s what you need to build out your portable audio recording studio.
Audio Recorder
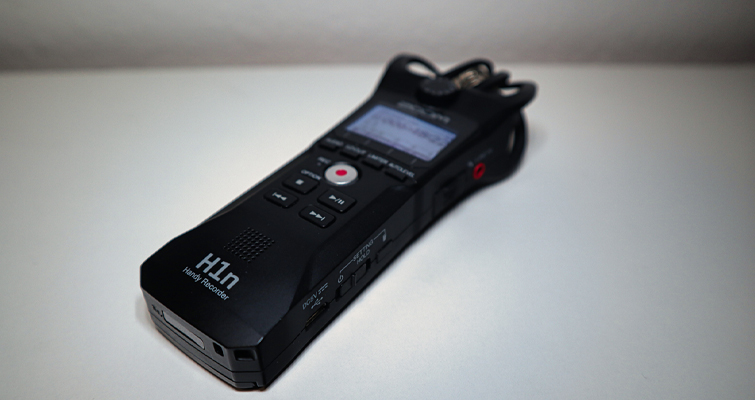
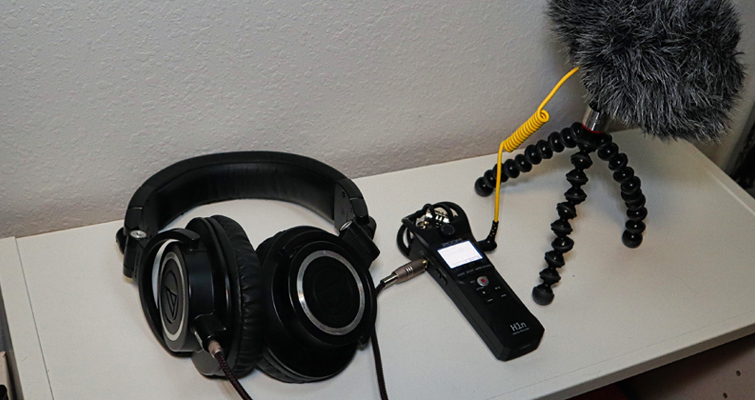
To start, you’ll need a portable recorder with at least a line-in port. I chose the Zoom H1n portable audio recorder because it has both line-in and line-out ports.
The line-in port on the right side makes it possible to use an external microphone, while the line-out port lets you connect a headset to monitor your levels. So, apart from being an audio recorder, it’s also a primary audio interface capable of high-resolution recording and more.
Since my journalism school days, I’ve had the Zoom H1n, which can be found for around $100. It’s one of the best gear investments I’ve ever made, as the little recorder is exceptionally versatile.
For example, pressing the “Audio” button toggles between recording formats, such as MP3 or WAV, with various combinations of bit depth and sampling rate options.
With the option to record in WAV format up to 96Khz/24-bit, the recorder can capture the above CD-quality audio. I tend to record in the lowest MP3 quality when I only need audio for my notes, but I always opt for the highest resolution when using the audio in a project.
Of course, recording in higher quality will impact your storage and decrease your recording time. Thankfully, you’ll be able to see how much recording time you have left every time you toggle to a different recording setting.
To avoid running out of storage mid-recording, get a microSD card like this one—the Zoom H1n only supports microSD cards up to 32GB.
The other buttons on the recorder can apply effects to the audio. The “Lo Cut” button blocks low-frequency sounds, including things like wind or the hissing of an A/C. Pressing the button multiple times toggles between three frequency cutoffs.
The other control, “Limiter,” does a similar thing on the opposite end of the sound meter, eliminating loud noises above the threshold, which keeps the recording from sounding distorted.
The final button sets the recorder to “Auto Level.” Don’t turn it up too loud, as it’ll make the microphone sensitive to unwanted noise. It’s a valuable feature if you don’t want to fuss with audio levels on-the-fly, especially if you expect them to fluctuate a lot.
But, in a controlled recording environment, using the gain dial above the display will create a more stable recording.
Microphone
For most situations, the built-in XY mics are fine. The condenser-type microphone is sensitive enough to capture a voice from across a big room, such as a city council meeting, which I’ve done.
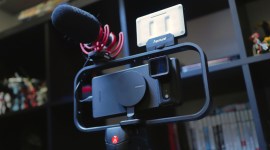
It’s not a bad microphone, but I like the Deity V-Mic D4 Duo more. The simplest explanation is that, by keeping the microphone separate from the recorder, I can adjust the recorder without the microphone picking it up. The Zoom H1n is so sensitive to movement or touch that the sound will get picked up in the recording if you brush against it or touch any button.
The V-Mic D4 Duo comes with a shock mount to prevent picking up vibrations. It also includes two windsocks.
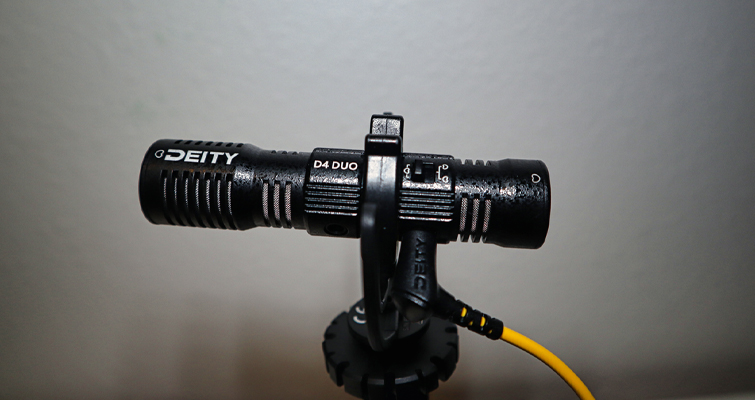
The Deity V-Mic D4 Duo is a vlogger camera darling due to its dual microphone setup that can record audio from either camera side. Setting the microphone to record solely from the front is awesome for voiceover, but dual recording is convenient if you do any interviews.
If you want to replace the rear-facing microphone, there’s even a TRS 3.5mm input for a lavalier microphone. When using both microphones, audio is recorded on separate tracks, with the front microphone on the left channel and the rear microphone on the right channel. Both channels can then be merged into a single track in post.
Don’t sweat it if spending an extra $70 on this microphone is out of your budget, as the Zoom H1n has an extremely capable microphone. But, if you want some extra wiggle room for improvisation, it can’t hurt to have a Deity V-Mic D4 Duo around.
Headset
Hearing your voice is hard to get over, but you’ll have to if you’re recording audio. Monitoring your audio will allow you to adjust to your voice’s volume or pitch, making it better to work on in post.
It helps me pick up nuances in my voice that I wouldn’t have caught until after editing the audio. I also find that monitoring my audio helps me ignore the outside world and focus on the task.
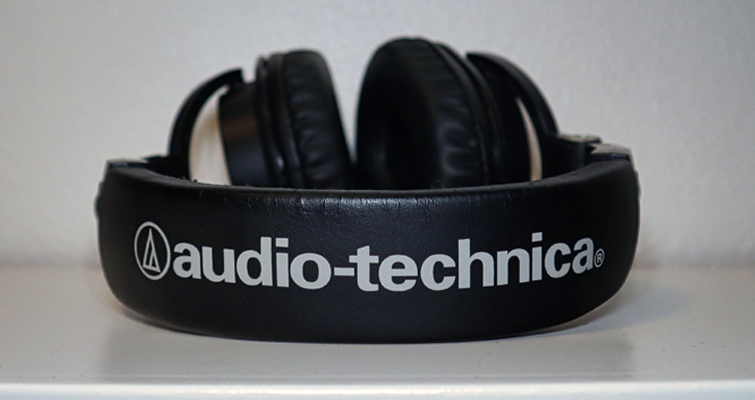
Any pair of wired headphones with a 3.5mm jack will work on the Zoom H1n, but you’ll want to pick up a pair of studio monitors for better results. These headsets have a balanced, neutral sound that relays audio as close to its original sound, so they’re the headset of choice for audio engineers and producers.
I used a pair of Audio-Technica ATH-M50X. At $150, they’re not cheap, but Audio-Technica makes affordable studio monitors like the $50 (sale price as of writing) Audio-Technica ATH-M20X.
Brand and price don’t matter that much, so long as it’s a studio monitor headset.
How to Make It Better
If a piece of gear exists, there’s always the possibility of an upgrade. For example, you could pick up a better recorder like the Zoom H4n Pro, a better microphone like the RØDE VideoMic Pro, or a better headset like the one I have. All those are viable upgrades, but I think treating the room for audio recording is a better way to spend your money.
You could throw a thick blanket or comforter on top of yourself and your setup while you record, which would produce some decent results—a moving blanket can also work. I’ve heard of podcasters and journalists doing this when recording away from their studios. Knock yourself out if you don’t mind setting up the blanket every time you record.
On the other hand, you could pick up a portable recording booth for cheap, like this one. Yes, it’s bulky, but it will aid with maintaining a consistent sound across multiple recordings. Whether using the portable recording studio at home or on the road, the collapsible audio booth should help smooth out your voice, and prevent echo and reverb.
As for me, I’m mostly planning on using my recording setup in my walk-in closet. While the clothing near my setup helps absorb some sound, the exposed wall behind the microphone is reflective.
I have an idea that involves sound panels that stick to the wall with double-sided velcro, which will make them easily removable. I’m not sure if it’ll work well, but the amount of space I’m soundproofing is small and perfect for some experimentation.
Why You Need It
Apart from being compact, the setup is also low-maintenance. Actually, it requires almost no design or maintenance. Because it runs on the battery-powered Zoom H1n recorder, I don’t need to rely on a power outlet. That also means I don’t have to fuss around with audio software, saving me time and speeding up the entire process.
I built this setup for the sole purpose of being able to record in a quiet environment, but it’s now my preferred way to record. Being inside a small, isolated room with no computer helps me concentrate on the voice work and nothing else.
In addition, I like being able to record anywhere in my home, regardless of power outlets or space. While the setup is travel-ready, that isn’t a priority because I work from home. However, I do acknowledge the benefit of having this setup while traveling. When I need to travel for an interview, I already have a portable audio recording studio that I can stuff in a backpack and deploy anywhere.
Though, the setup’s modular design is what makes it optimal. It relies on a few key pieces that are interchangeable. The gear I already had lent itself well to the project, but you can pick up the individual components at an affordable price, or make a custom build with the gear you already have.
What’s important to remember is that you don’t need to buy the best, most expensive equipment. This setup is simple and works, which makes it a solid base to build on.
On the other hand, there’s also a lot of room for upgrades, which makes this a long-term kit you can add to piece-by-piece, as needed. I already have a few ideas.
For more gear updates, tips, and tricks, take a look at these gems:
- The Best Camera Bags for Run-and-Gun Videography
- The Best Gear for Creating Your Next TikTok Video
- The 6 Best Filmmaking Cameras Under $1,000
- The Power of Movement: The Best Gimbals for a Small Budget
- The Most Practical Live-streaming Microphones on the Market
Cover image via Guitar Studio.