Controlling High, Medium, and Low Image Noise Frequencies
Every filmmaker is familiar with image noise, but what are its frequencies, and what’s really going on when we clean it up?
Video footage at its most fundamental is the recording, storing, and playback of light waves reflecting off of objects in the frame. The light waves then strike one of millions of photo-sensitive pixels that stores the charge of the wave before transferring that data to specialized hardware for interpretation and assembly of the final image.
As a result of this imaging process, each pixel is subject to faulty inputs caused by any number of sources of image noise. Ranging from cosmic radiation to over-volting the sensor, all noise essentially overwrites the information you were trying to capture at each affected pixel.
There are plenty of methods for handling this noise, both at the hardware and software levels, but the technology behind these tools goes largely unexplored by the average filmmaker.
Today, we’re taking the scenic route. Let’s take an in-depth look at one of the most prevalent noise reduction techniques and see if there is a way to mimic its results manually. At the very least, we should get a better idea for what our tools are doing under the hood.
Spatial Noise Reduction
Most video noise reduction techniques fall into one of two categories: spatial and temporal. As the names suggest, spatial noise reduction deals with noise across each pixel of each frame, whereas temporal noise reduction examines multiple frames to determine whether pixel readout is intended or a result of image noise.
Because spatial noise reduction addresses each frame individually, its results should be the easiest to replicate manually.
The primary way most programs implement spatial noise reduction is by analyzing the frequencies of the recorded light from each pixel block. This is because noise has different characteristics depending on the frequency of the affected pixel.
High, Medium, and Low Noise Frequencies
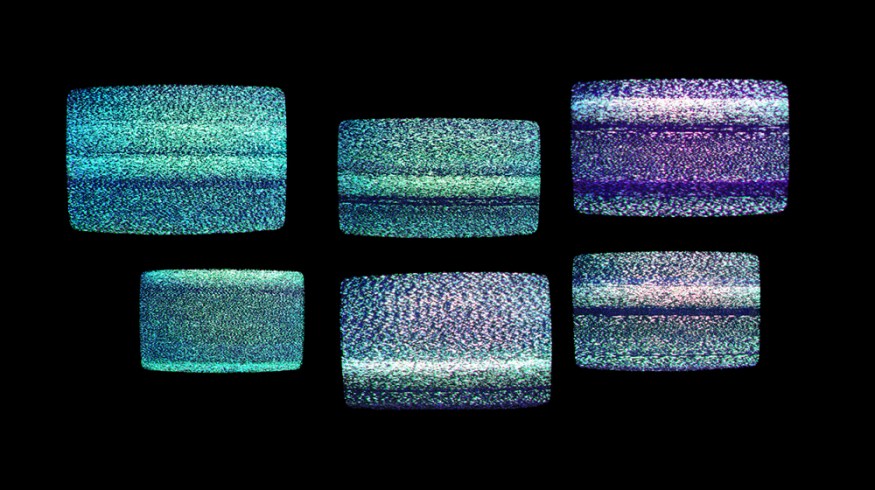
Regardless of type, all video noise breaks down into one of three categories based on how the noise manifests in the footage: high-, medium-, or low-frequency.

The sharp, staticy nature of high-frequency noise is usually the most noticeable, but patchy medium- and splotchy low-frequency noise will affect your footage just as much.
Let’s look at two clips with noise problems and manually select and bring down the visibility of the noise.

We’re starting out with an example from a short I shot on super 16 several years back. I underexposed it a fair bit for effect, but during the film transfer, the film grain turned into irritating digital noise across most of the frame.
I’ve brought the exposure up a bit for the actress — and also to make spotting the noise frequencies a bit easier. For this shot, we’ll bring up the levels on our actress and then do our best to turn all of the noisy pixels to black.
Selecting
The tool we’re using to select specific regions of noise today is the HSL/Secondary tab in the Lumetri Color Panel.
When selecting your footage, make sure to ask yourself a few questions:
- What color is the noise I want to target?
- How intense are the colors?
- Is the area primarily highs, lows, or mids?
I’ve duplicated the video three times for each noise frequency.

To select the blocky dark blue low-frequency noise, I have targeted all colors with the exception of the red and orange skin tones in the Hue qualifier. I also selected the top 10 percent or so of the Saturation qualifier before sliding the feather all the way to the left to create a soft falloff of color tones. Finally, I selected the bottom third of the Luminance qualifier.

For the splotchy lighter-blue, medium-frequency noise, I’ve selected yellow to magenta in Hue, the top 25 percent of Saturation with falloff to about the 50 percent mark, and then the bottom third of the Luma.

To isolate the bright, starry pixels in the high-frequency noise, I targeted the cyan tones of the high-frequency noise, selected the full saturation range, and then isolated from about 35-65 percent on the Luma controls.
Now that we’ve selected each frequency of the noise, we’re going to adjust the levels and color balance of our selections to turn the problematic pixel blocks as close to black as we can get them.

I slightly denoised and blurred the low-frequency clip to create a bit of feathering for the low selection before bringing the levels down about 30 percent, warming the selection and pushing the tint to green. I fine-tuned my results by slightly sharpening and then fully desaturating the selection.

For the medium selection, I pushed the temperature to 100 and pulled the tint almost all the way over to green before bumping the contrast up about halfway and then fully de-saturating.

For the high-frequency noise, it was important to denoise the selection, as the type of noise we’re targeting has a very small radius. Denoising the selection helps to open the mask up a little bit.
I denoised slightly, pushed temperature fully to orange and tint fully to green, pumped the contrast to 85, blurred slightly, and then fully desaturated.
To finalize our color blends, we’re stacking all of the duplicated and repaired tracks on top of a medium-gray color matte. I stacked highs on the top track, mids on middle, and lows on the bottom. For the lows, I selected the Vivid opacity blend mode and set the opacity to 95 percent. For the mids, the blend mode was Overlay set to 60 percent, and highs were set to Multiply at 35 percent.
From there, I nested the three separated tracks and made a few tweaks to the levels until I found the best look. All that’s left now is to compare the results with a copy of the original with similar adjustments to see if all this extra work paid off.

Before

After
I think there’s a pretty clear difference between the two — ours comes out a little ahead.
The first example was a little easy because we essentially only needed to turn every noise pixel into a black one. Let’s take a look at a more realistic use case, wherein we will need to blend the results into the good parts of the frame.

In this shot, we have a substantial amount of high-frequency noise in the Luminance channel and a fair amount of mid- and low-frequency noise in the green channel.

To select the low-frequency noise, I used the Hue qualifier to select all tones except for reds and oranges, selected the top 40 percent or so of the Saturation qualifier with a small 5 percent or so falloff towards the shadows, and then isolated the bottom 25 percent or so of the Luma qualifier with some softening on either side.
To repair, I denoised the selection at 50, blurred the selection slightly, used the three-way color corrector to boost shadows, cut mids, and slightly pulled back on the highs. I warmed and pushed the tint to magenta before pushing contrast to 20, blurring softly and then reducing saturation to 70.

For the mids, I used the Hue qualifier to select all colors but orange and red, selected the bottom 25 percent of the Saturation qualifier with about a 10 percent falloff to the highs, and then selected from about 10-30 percent on the Luma qualifier with falloff in both directions.
To repair, I denoised by 50, blurred to 15, cut shadows and highs, boosted mids, cooled the temp to 50, pushed magenta to 40, desharpened by 50, and desaturated to 85.

For the highs, I selected all colors on the Hue qualifier, the bottom 30 percent with a 15 percent or so falloff to the highs on the Saturation qualifier, and then 30-50 percent on the Luma qualifier with about a 15 percent falloff on both sides.
To hide the noise, I denoised by 50; pushed blur all the way to 30; boosted shadows and cut highs and mids; and pushed magenta to 25 before pushing contrast, sharpen, and saturation controls all the way to -100.
To finish this out, I am again stacking the clips with the bottom set to the Color Dodge blend mode at 100 percent opacity, middle set to Multiply at 65 percent, and the highs set to Multiply at 90 percent. I then nested the clips to apply final adjustments to bring the levels up and warm the entire image, and then I slightly shifted the tint to get more accurate skin tones.

I then added a 35mm film grain to further hide the noise and set it to the Lighten color blend mode at 20 percent opacity. Finally, I added an adjustment layer to boost the contrast in the shot a little more, and I made a slight adjustment to the Curves panel to mitigate the green tint in the image.
All that’s left is to compare these results to a version of the original clip with similar adjustments excluding our noise reduction.

Before

After
I think the winner is clear.
Whether or not you decide to incorporate manual noise reduction into your image mastering workflow, I hope you got a better grasp of how specific noise frequencies affect your footage and some of the ways spatial noise reduction tools target and reduce noise — and perhaps a few tricks when none of your other tools are working out. As always, experiment with your own footage and see what other tricks you can figure out!
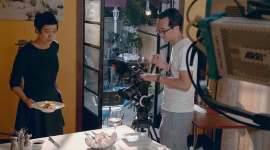
Cover image via kasha_malasha.
Looking for more post-production tips and tricks? Check these out.