
Color Grading Freebie: 65+ Free Premiere Pro Looks

Create that cinematic look with these movie-inspired color grading presets to use for your next video project.
Applying looks and LUTs—it’s the ultimate footage glow-up. Whether you’re using the assets to create your film’s all-encompassing grade or treating them as a fast reference on set for a look you’ll build in the edit, these one-click solutions are a sure-fire way to transform flat, straight-from-the-camera footage into a thing of cinematic beauty.
That’s why we’re excited to give you a bunch of them for free in the sections below. But, before we dive into the freebies, let’s quickly go over LUTs.
What Is a LUT?
LUTs are coded math equations that you plug into your NLE to change and manipulate the color of your footage. Each LUT is a specific look that’s been designed and tweaked to change the colors of your original shot in a specific way. Did that make sense?
Are you interested in learning to create these looks and master the Lumetri color panel yourself? Check out our list of the best YouTube channels to follow for color grading and color theory.
- 10 Best YouTube Channels for Colorists and Color Grading
- Everything You Should Know About Picking Your Film’s Color Schemes
Hollywood Looks: 14 Free Premiere Pro Lumetri Looks
These free Premiere Pro Lumetri Looks are a fast, hassle-free way to add blockbuster style to your project. Check out the video above to see how simple they are to use, then make them your own below.
How to Install and Use Free Premiere Pro Lumetri Presets
1. Click the Download button at the bottom of this section, then unzip the PremiumBeat Hollywood Lumetri Looks folder.
2. Go to the Premiere Pro folder.
- Mac: Open a new Finder window and go to Applications, then open Adobe Premiere Pro CC.
- PC: Go to the C:/ folder, open Program Files, open Adobe, then open Adobe Premiere Pro CC.

3. Open the Contents folder, then open the Lumetri folder.
- Mac: Hold Command and click on Adobe Premiere CC, then select Show Package Contents. Open Contents, then open Lumetri.
- PC: Open the Lumetri folder under Adobe Premiere Pro CC.

4. Open the Looks folder, then open Cine Looks.

4. Drag-and-drop the free Lumetri .look files from the PremiumBeat Hollywood Lumetri Looks folder into the Cine Looks folder.
5. Restart Premiere Pro.
6. Open your Project file, then go to the Color tab.
7. Select the clip you want to color grade on the timeline, then go to the Creative tab.
8. Click the Look drop-down menu, then select the free Lumetri Look preset of your choice. Easy peasy.
*These color grading presets are free to use in all personal and commercial projects. By downloading, you agree not to resell or redistribute these free assets.
13 FREE Cinematic LUTs from Shutterstock
A new color correction tool called Photon by Color.io has a whole suite of exciting techniques that allow creators to design your own custom LUTs.
We’ve had quite a bit of fun experimenting with it. It’s a tool that allows you to view and manipulate your colors in a 3D-visualized space, without the need for nodes or excessive masking. Think of it as a tangible visual map that allows you to grab, pull, and tweak specific areas of your image. It’s a lot of fun.
They also have another phenomenal tool called Match. It allows you to upload your own images and map the colors from it onto a Look Up Table (LUT) that you can use anywhere.
I’m talking about this tool because Photon is how these LUTs were built. We literally took stills from some of our favorite films and worked off of that—creating the look of the LUTs.
35 FREE LUTs from RocketStock
The best part about these LUTs? They’re compatible with all the significant NLEs—Premiere, FCPX, Resolve, and Media Composer. So, if you ever find yourself switching programs, you can take your looks with you to maintain your visual aesthetic.
Unlike the LUTs in the top section, these are CUBE files. All you have to do is download the pack, open up your editing software, and input the file into your project. No problem.
Wanderlust: 17 FREE LUTs for LOG Footage
Like the LUTs in the RocketStock pack above, these free assets work in all big-name NLEs. However, these LUTs are designed to only work when applied to LOG footage.
I find Wanderlust’s looks comparable to those you get from the paid LUTs pack offered by Buttery Films. The pack’s unsaturated aesthetic is heavily inspired by travel, and they don’t look stock.
I’ve found these to be the most malleable of the lot I’ve included in this article.
Learn How to Color Grade
No matter your skillset, color grading is an ever-shifting experience. Every new project means working with new information captured by different cameras in different formats. When you master the color workflow, every final project looks more professional (and you open the door to more gigs).
You not only develop a better understanding of how cameras capture specific colors, but you learn to understand what your tastes and preferences are.
If you want to improve your color skills, we’re here to help. Over the years, we’ve written hundreds of articles on color grading, color correcting, editing, and, really, all things post-production. You’ll find plenty of empowering resources in our Color Grading section and on our YouTube channel.
If you’re new to all of this, fast-track your knowledge with these helpful videos on color grading basics and how to use LUTs:
- Color Matching Different Cameras
- Color Grading Skin Tones in DaVinci Resolve
- Learn How To Color Grade Like The Most Iconic Films Ever Made
- Color Grade Like Sicario
- Quick Color Theory: Exploring the Color Wheel
Looking for more free video assets? We’ve got you covered:
- FREE Vaporwave and Synthwave Graphics
- Over 280 Free Sound Effects for Videos, Apps, Films, and Games
- 215 Free Motion Graphics, Sound Textures, Social Designs, and More
- 13 FREE Textured Motion Graphics for Premiere Pro
- SOCIAL PACK: 50+ FREE Social Media Marketing Elements and Designs
- 80+ FREE Cinematic Atmospheres: Musical Textures and Sound Files
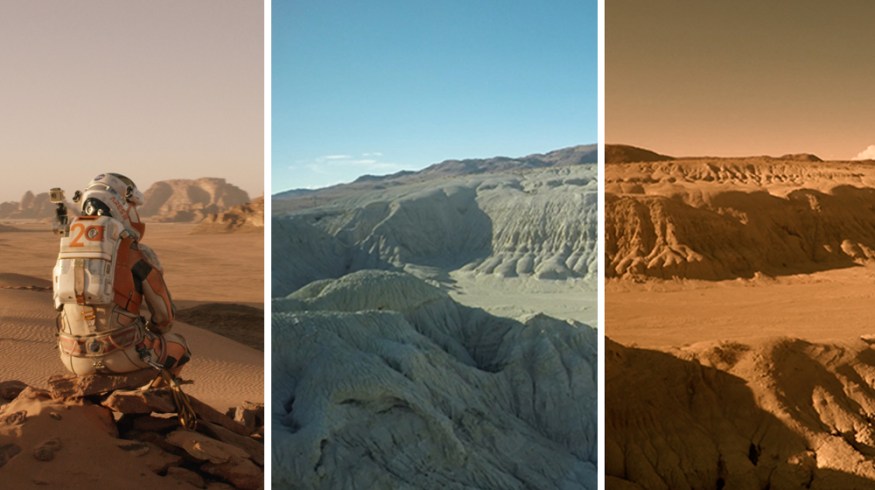
Cover image via 20th Century Fox.


