
The Best Microphone Setups for Every Type of Podcaster

Starting a podcast? Here are some audio basics, studio setups, microphone reviews, and input for different styles of podcasts.
The bare essentials for a podcast breaks down to a computer outfitted with some audio editing software, a microphone, something to connect the two devices, and a space to record in.
Here’s a breakdown of all the essential gear you need to take the podcast idea you’ve been formulating and help turn it into a reality.
The Fundamentals of Sound Recording
Before we dive into the sweet gear reviews below, let’s take time to do some rundowns on a few basic gear choices and audio elements for those who are brand new to sound recording.
XLR vs. USB

The three-pin XLR is the essential audio cable. It’s been around for ages and will remain on sets for years to come. The three pins are ground, a positive, and a negative terminal to relay electricity from one point to another. Higher-end gear, and most audio recording gear in general, will rely on this cable.
Since no home computer that I know of has XLR inputs, you’ll need a device to bridge the gap between the microphone and the computer. This device is usually an audio interface or a mixer that changes the analog signal from your mic and transfers it to a digital one. These will have options to manipulate your signal’s gain (loudness), headphone monitoring levels, and audio outs to get the signal to your computer.
You could also bypass using a computer in the recording stage altogether. Instead, go straight for a recorder such as the Zoom H6, which has four XLR inputs with gain control. Then, upload to an editing software later if you need to keep the footprint smaller or do a podcast on the road.

USB output microphones are increasingly popular since they’re user-friendly and require less gear to record straight to editing software. Many microphones now offer both USB and XLR outputs already built-in. So, no real advice here. If you have a USB microphone, plug it in and get started.
The Zoom H6 is an older recorder model from Zoom; however, if you want a more significant, newer recorder offering from the powerhouse audio company, check out the Zoom H8.
Dynamic vs. Condenser
Dynamic microphones are durable, moisture-resistant, resilient mics that capture loud sounds. These mics are a mainstay at live music venues.
These microphones don’t require any external power, so plug it in and get to rocking some sweet vocal tracks. This is an excellent option for anyone podcasting on the road in unpredictable settings and weather.
On the other hand, condenser microphones thrive in controlled environments such as studios. They tend to be much more sensitive than dynamic microphones—and louder. These microphones require an external power source, so you’ll want to check out an interface or mixer with phantom power to supply these mics with electricity.
Condenser microphones are also usually much more fragile and expensive, so be sure to treat them well. This should be your microphone choice if you want to achieve a higher-end production value on your podcast.
If you want more info on the various types of microphones you can find—whether it be for podcasts or video production—check out our all-encompassing list on what each type does and what kind of recording they’re made for.
Recording in Your Home
The overwhelming majority of anyone reading this article won’t have access to a studio or the ability to build one in their home. So, the next best option is to make your home the best recording option it can be.
First of all, stay away from large, open rooms in your home. Instead, focus on a small space that you can more easily control. Reduce sound leaks from other parts of your home by recording in a room with carpet, utilizing professional soundproofing, or even just hanging blankets.
You can also build your own DIY voiceover booth with just a few items, without depleting your bank account.
If this isn’t feasible for you, the simplest thing you can do to improve the overall sound quality of your show is to quietly sit in the room where you’ll record and listen intently.
Is there an electric hum from some machine in the room? Is the air vent blasting right into a space where you plan to place your microphone? Or, are the fans on your computer kicking on? Minimize as much sound pollution as possible, and you’ll find yourself at a good starting point.
You can also invest in boom arms with shock mounts. These will absorb vibrations that could affect your audio—such as vibrations from when you touch items near the mic, like a desk or your computer. For some of the microphones listed below, these things are necessary to get them production-ready.
If your podcast has multiple people involved, make sure that one host’s mic isn’t directly behind a different host’s mic. Separation is vital so that each recording sounds sufficiently clean. That way, you can maintain isolated audio tracks for each host, and they aren’t bleeding into each other’s mics.
You’ll also want to invest in a pop filter for your microphones. A pop filter will make a massive difference in limiting the effects of your plosives or the popping sounds created by the consonants p, t, k, b, d, and g. Notice the breath that leaves your mouth when you say those letters out loud.

Now that we’ve covered some of the basics, let’s get into some of the best mics around. If you’re looking for another in-depth on microphones and their pickup patterns, check out this article.
Microphones for Beginner Podcasters
Samson Q2U USB/XLR Dynamic Microphone
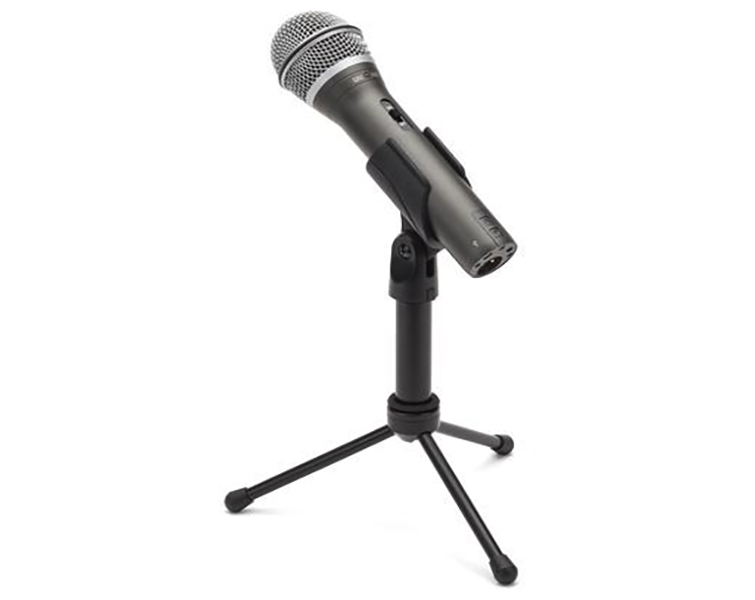
This dynamic microphone is the perfect way to get your podcast started. It comes with all the accessories you need to jump straight into recording right out of the box, and it’s incredibly affordable at just $50 online.
The kit comes with a microphone and a small stand, perfect for a desktop. It also includes an extremely handy windscreen should you ever need to take your show out into the elements, as well as all the necessary cables for hooking the mic up into the computer.
This is an excellent choice for anyone looking to do a solo podcast. One of the most appealing aspects of this mic is that it has both a USB and an XLR out, which you can use simultaneously should you want to record on separate devices.
Remember that if you solely rely on XLR (which is almost always better quality), you’ll need to invest in either a mixer or a digital recorder. The Audient iD MkII is a nice option that I use for almost everything.
Check it out below:
The Blue Snowball USB Microphone

One step up from their iCE model, and slightly more expensive than the Samson Q2U USB, this microphone comes with an adjustable tripod.
It also features a cardioid mode suited for recording a podcast, a cardioid mode with a -10db Pad to record louder sounds with higher fidelity, and an omnidirectional mode that will pick up sound equally from all directions.
If you’re looking strictly for a condenser microphone over a dynamic mic, this will be a good beginner option.
This mic is also ready to use straight out of the box, and it’s one of the more well-known, low-cost choices for recording podcasts. This is a good start for beginners, but to use this mic and get rich tones out of it, the user must be somewhat close, from personal experience.
Instead, I’d go with the Samson microphone overall for this reason. I’ve used Blue on a few occasions for being a guest on a podcast, as well as needing to record voice-over work, and neither sounded . . . great? But, then again, you get what you pay for, and the results were indeed better than a cheap mic from a brand you’ve never heard of. Skip this mic unless you’re strapped for cash.
Semi-Pro Podcaster Microphones
Blue Yeti USB Microphone
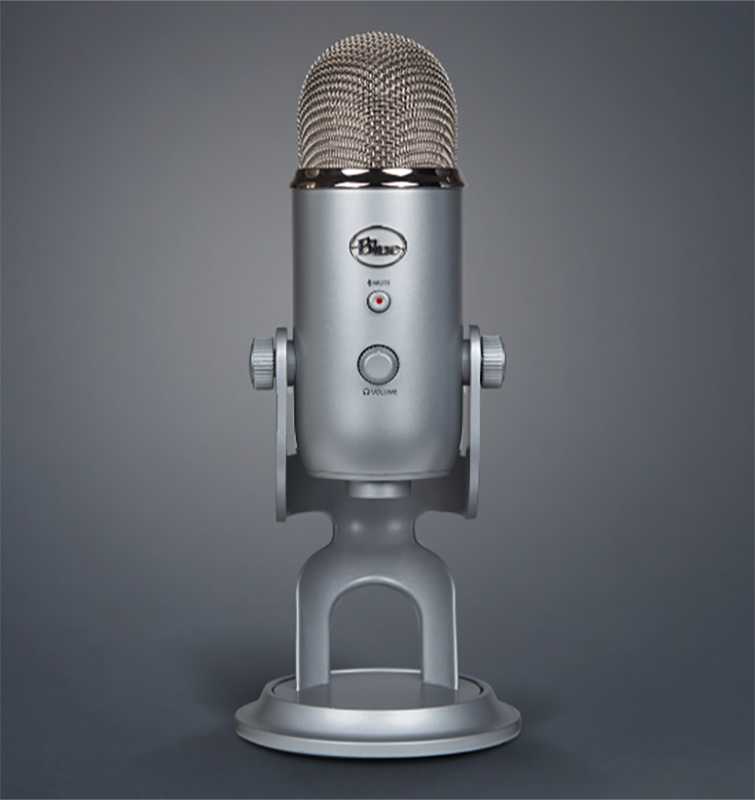
For those looking for something more serious, this mic is a fantastic option and is by far the most popular choice for people looking to create a podcast. These mics produce excellent results, are easy to use, shipped production-ready, and are still affordable.
When I said I had a bad experience with the Snowball Blue Mic, this one quickly quashed those initial hesitations. In fact, I purchased one myself when the pandemic hit and needed to record myself for meetings, narration, and anything else we’ve had to do since all this started.
This microphone also includes a tabletop stand, but if you want to take it to the next level, you can always purchase a Blue Radius II shock mount and a Heil PL2T boom stand. These accessories will help you achieve a more comfortable experience and improve your sound quality.
This mic has gain control, a mute button, zero-latency output, and a tri-capsule array of three condensers. Some audiophiles may knock this microphone, but this will get the job done for a mid-level mic.
RØDE Podcaster USB Dynamic Cardioid Broadcast Microphone/ RØDE Procaster

RØDE has a rich history of creating quality microphones, and now they bring that history with them as they dive directly into the podcast market. It even has a sibling, the RØDE Procaster. Essentially the Podcaster utilizes USB to connect directly to your computer, while the Procaster uses an XLR.
To use the Procaster, you need an audio interface, but you can find a multitude of other uses for this mic outside of your podcast with this purchase.
The Podcaster will be more expensive than the Blue Yeti, and only comes with a USB cable and a ring mount. So, you’ll need to purchase either a desktop stand or a studio boom/shock mount to get this production-ready.
The RØDE PSM1 shock mount is a solid option for this microphone, as the mic is slightly larger and needs a decently sized mount to hold it. This, of course, will raise the overall cost of choosing this route, so that’s something to contemplate.
The Podcaster has a headphone output to have zero-latency monitoring, offers excellent sound quality, and doesn’t require phantom power. It also has a built-in pop filter. It’s a dynamic microphone, so it’ll perform well in home studios or any area that’s not soundproofed.
This is a notch above the Blue Yeti in quality, but the overall cost difference may make the Blue Yeti a better option.
Professional Podcaster Microphones
Shure SM7b
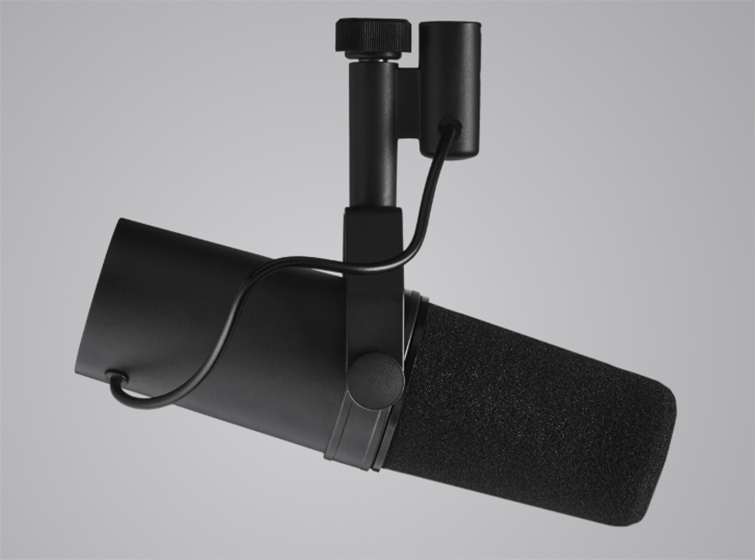
Widely regarded, supported, and beloved, this microphone will give you top-notch quality for a professional-sounding podcast. The only pitfall to this microphone might be that it’s too good, as it picks up background noise or any plosive sounds that may come up. So, I suggest a friendly, quiet studio setting for this microphone. Also, definitely attach the A7WS windscreen that ships with the mic.
This mic is sturdy, built like a tank, has an incredible frequency response of 50 to 20,000 Hz, and has stunning clarity that’s awesome, not just for your podcast but for any vocal endeavors.
I’ve owned this mic for about six months now and can honestly say it’s the best sounding mic I’ve ever owned and worth every penny. So, if you need me, I’ll be the guy walking around with a “Shure SM7b” fanboy shirt on.
Note, however, that there’s no shock mount for this microphone. Invest in a pole arm or mic stand if this is the microphone you decide to purchase.
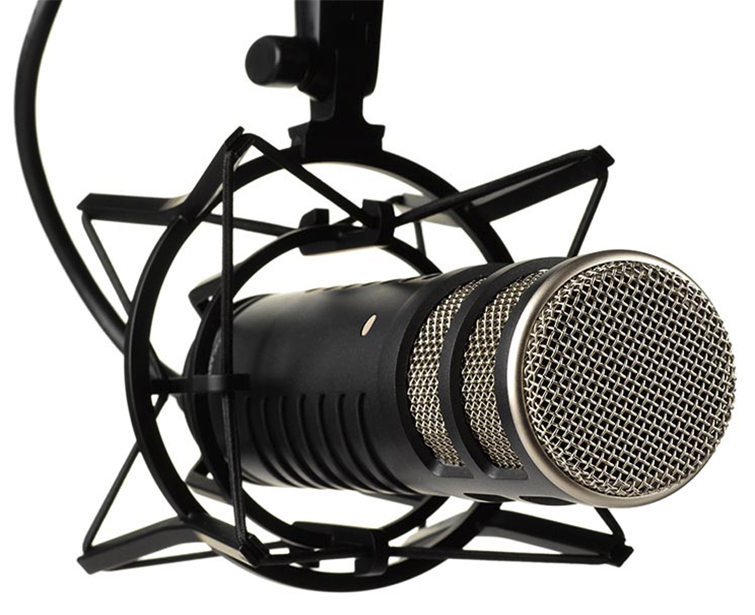
HEiL Sound PR-40 Dynamic Studio Microphone

This is an excellent choice for a dynamic mic. It’s slightly cheaper than the Shure SM7b, and it’s honestly one of the more aesthetically-pleasing microphones to make this list.
Doesn’t it look like something from a ’70s music studio? No? Just me?
It features a frequency response of 28Hz to 18kHz and is balanced at 600 ohms. This mic has an available shock mount with the Heil Sound PRSM-B and pairs nicely with the Heil Sound PL-2T Overhead Broadcast Boom.
This microphone will give you the same quality the big-budget podcasts have because they’re most-likely using this microphone, as well. It would be challenging to feel disappointed by this microphone.
Add-Ons: Finish Out Your Podcast Kit

Sony MDR-7506 Professional Large Diaphragm Headphones
This industry classic has near-flawless reviews from thousands of people who chimed in with their love and admiration for these headphones.
I’m writing this article with a pair of these fabulous large-diaphragm headphones on right now. I’m currently listening to a mix of Sturgill Simpson, Deftones, and Death Grips . . . and they sound better than ever.
These headphones don’t go entirely around your ears, so that might be a deal-breaker for some, but they’re comfortable and offer superb sound quality.
RØDE RØDECASTER Pro
This podcast production studio comes complete with four headphone inputs that have customizable volume knobs for each host and four XLR inputs with phantom power. It also houses eight sound pads to program custom sounds, a microSD card slot, a touchscreen, and offers Bluetooth in and out.
It even double checks with you when the power button is hit to make sure you want to turn off the mixer, to prevent you from losing any valuable recordings. This machine is incredibly impressive and will take your podcast to the next level.

A Microphone for Every Type of Podcast Setup
Let’s discuss the different types of podcasts you might pursue and explore some tips for each one.
The Solo Podcaster
Grab a microphone like the SM7b, attach it to a boom arm, slap on a pop filter, and set it all up in a room with the least amount of noise. Now, connect an XLR from the microphone to an audio interface, then into your computer. Boom, you have a high-level-sounding podcast that can rival the pros.
- Recommendation: Shure SM7b
Two-Person Podcasts
Double the microphone setup from the solo pod setup, and make sure the two guests are not facing directly across from each other. This will limit the audio bleed of one guest’s voice into the other one’s mic.
Use the USB out to go directly into a computer, thus eliminating the extra cost of the interface. Or, if you’re rolling on an extremely low budget, you can use the Blue Yeti.
The Yeti records on both sides of the mic. So, in this case, you’d actually want to sit directly across from each other and share the same microphone to record audio. Just be extremely careful about not talking over each other if you use this method. Obviously, it isn’t the most professional of settings, but you can make it work for an extremely low cost.
- Recommendation: Blue Yeti Mic
Multiple Guests Podcasts
For more than two guests, you’ll want a mixer to control each mic input level and adjust each person’s headphone levels. The RØDECASTER Pro above is an excellent solution for this.
Shock mounts will minimize any vibrations that could accidentally find their way into your audio files. I highly recommend using shock mounts if the guests are all sharing one table.
I also recommend placing everyone in a curve so the guests can see each other. This limits the possibility of any guest bleeding into another guest’s mic.
- Recommendation: RØDECASTER Pro
On-the-Go Podcasts

If you’re completely run-and-gun, I suggest using the dynamic Samson Q2U. Run it into a Zoom H6 audio recorder, and then dump the files to edit on a computer later. The dynamic mic will be durable, more resistant to weather, and won’t need any phantom power to operate.
On the other hand, if the show takes place in a controlled environment with a table, I’d most likely go with the Blue Yeti. Run a USB out of the Yeti straight into your laptop, and you’re ready to roll.
You could even use the fact that this mic records in both directions to your advantage. Place the side of the mic facing the audience and adjust it to pick them up. A nice room tone/crowd noise will add to the live feeling of your podcast.
- Recommendation: Samson Q2U with a Zoom H6
Conclusion
Starting a podcast is hard and choosing the perfect mic amongst the thousands of mics available is hard enough. Hopefully, this list gives you some context for what some mics have to offer and why you might need specific types of pickup patterns and features.
Just remember, the first step is to record the first episode and figure out what you need as you go along. Trial and error is the most effective way to determine what you need and how you operate with this new medium.
Good luck out there!
Also, if you need FREE sound effects for your podcast, check out the hundreds of free effects we’ve released over the past few years.
For more audio recording and general filmmaking advice, tips, and tricks, check out these articles:
- The Indie Filmmaker’s Guide to Recording Audio
- Is the Canon EOS R5 Actually a Good Camera for Filmmakers?
- Affordable Field Recorders for Filmmakers
- Have We Reached The Video Quality Threshold for Sub-$3000 Cameras?
- 9 Things You Should Check Before Recording Audio
Cover image via Jacob Lund.


