
How to Shoot Interior Locations with Limited Lighting

Need to shoot an interior location without any lighting equipment? No problem. Here’s how you pull it off.
Filming an interior location without lighting equipment is a difficult task. This is a common challenge for low- or no-budget productions. (Or rogue filmmakers without permission to shoot—come on, we’ve all done it.)
Let’s have a look at how you can make the most of your interior location and walk away with great-looking images.
Know Your Limits
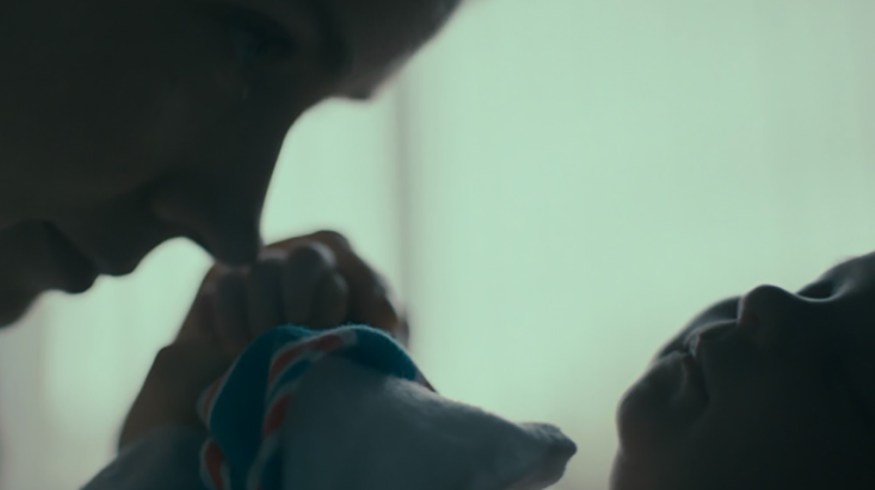
First and foremost, you have to acknowledge that you won’t be able to finish the day with shots that look like the work of a twenty-person crew. It’s undoable, and you’ll only set yourself up for disappointment if you aim to pull off a shot like the still below.
Acknowledge that you have no lighting and lighting accessories and work within those confines. More importantly, keep a visual reference guide of films that have opted for a more natural approach to lighting.
While this style of cinematography is prevalent in campaigns and short films on Vimeo, you can also find inspiration in feature films.
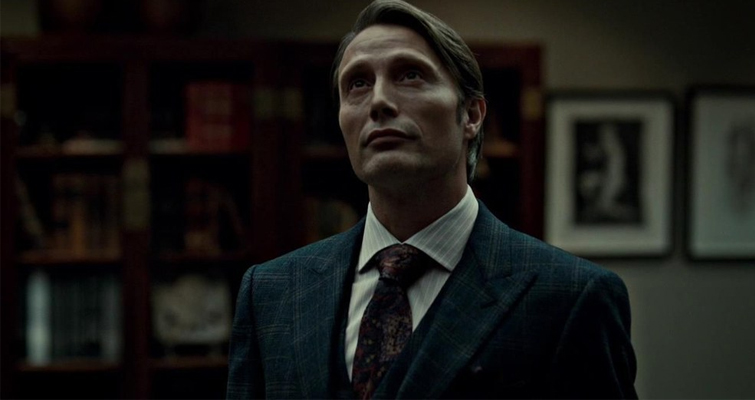
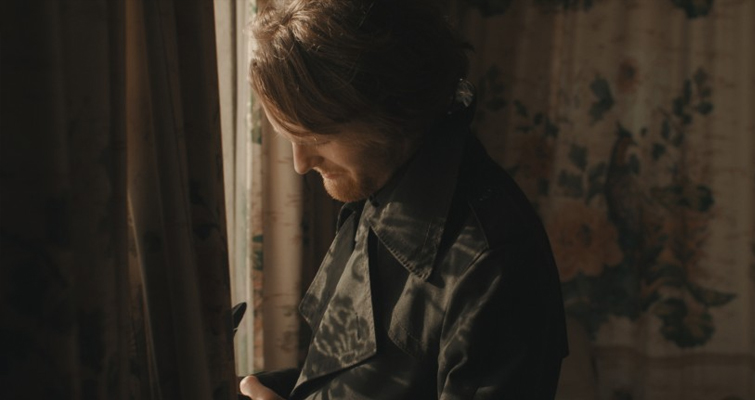
For example, take note of the stills below from Arrival, photographed by Bradford Young.
While I cannot completely confirm that these shots were photographed with only available and practical light, it’s probable judging from the behind-the-scenes featurette.
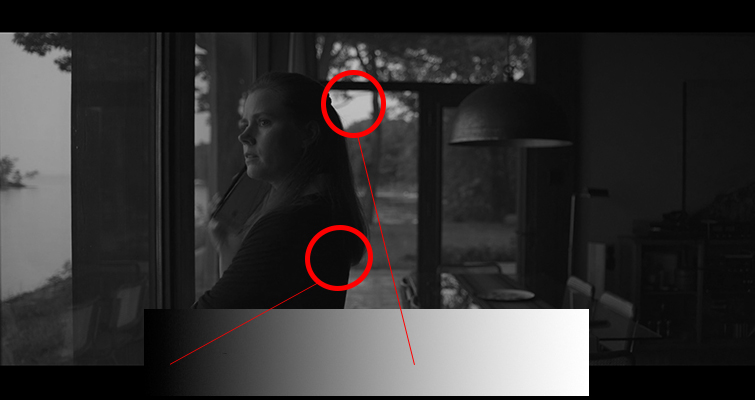
Go Low Contrast
We’ve covered the concept of tonal contrast before. Now, it’s time to deploy that knowledge. If we convert the Arrival still into a grayscale image and then measure the tonal values, you can see that the range is quite limited.
Keeping in mind what you can and cannot pull off without lighting equipment—capturing a high-contrast image will be complicated. Without grip gear, it’s going to be difficult dropping areas into complete darkness, and without lights, it’s going to be hard to illuminate your subject brightly.
As Bruce Block states in The Visual Story: Creating the Visual Structure of Film, TV and Digital Media,
The Principle of Contrast & Affinity states: The greater the contrast in a visual component, the more the visual intensity or dynamic increases. The greater the affinity in a visual component, the more the visual intensity or dynamic decreases.
Contrast = Greater Visual Intensity
Affinity = Less Visual Intensity
– Bruce Block
Again, correlating with tip one on knowing your limits, recognizing that a flatter image won’t bring as much visual intensity is a step forward in capturing the content you want.
Window Lighting
Windows will play a crucial role in lighting your interior location, especially if you’re shooting during the day. A common way to get good results is to shoot facing away from the window and position your actors in the natural light spill. (Diffuse the window with netting if you need to.) This produces a soft, natural light suitable for most projects in any location.
However, what if you exposed the exterior instead, leaving your subject silhouetted in the window? This won’t work well if you’re filming during standard daylight (unless that’s the look you want), but if you adjust your filming schedule for blue hour or golden hour, you get beautiful colors and soft light to work with.
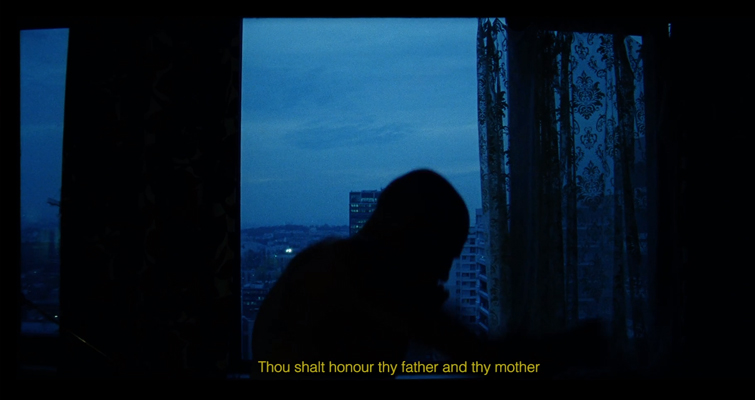
The one drawback to this approach is that its uses are somewhat restricted. While I imagine the audience would be okay with transitional moments or scenes of reflective thought and short conversations, dialogue-heavy scenes may be too dreary to get through when you can barely make out the actor’s facial features.
Don’t Use All the Practicals
If your location is a hotel room, you’ll likely have an abundance of different practical lights at your disposal. Hotel rooms often have various wall lamps with independent controls, ceiling lights divided into two areas, and table or bedside lamps. That’s a lot of practical lighting to work with.
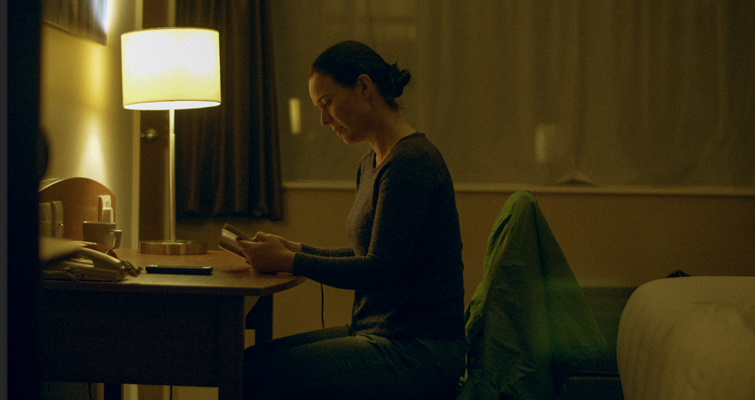
However, instead of turning on several lights to fully illuminate the room, situate your talent near just one practical light source and work with a low-key setup.
There are two reasons for this. First, it correlates with working with low contrast. A single lamp won’t brighten every inch of the room, but it will illuminate objects nearby, and the light falloff will travel across the room, slightly bringing the shadows away from complete darkness. To some extent, using the example still above, it mimics what the light is doing in the Arrival still.
Secondly, using just one practical light creates compositional space and prevents the scene from looking flat. Paradoxically, you usually achieve this with extra lights, not without them. But, we don’t have a fresnel to use as a rim light, nor an additional lamp to place on the shelf behind. If we were to switch all lights on, the composition would become extremely flat while it would fully illuminate the room.
Minimize Grading
All these tips restrict the ability to manipulate the color of your image. Low contrast and a lack of light will likely result in a desaturated color palette. You’re just not going to be able to work with an abundance of color data. Therefore, put on your Roger Deakins cap, and try to capture the colors you want in-camera.
Use your white balance to warm or cool the shot, rather than relying on the process in the edit suite, as the image may break down.
Of course, this depends entirely on the camera system you’re using. An 8-bit DSLR image will struggle to isolate and manipulate dark and desaturated areas.
Filming an interior location without any lighting equipment is not a situation many filmmakers want to find themselves in, but by using your disadvantage as a creative motivator, you can capture some unique shots.
Looking for more on lighting? Check out these resources:
- Using Practical Lights to Convey Mood
- Lighting A Scene Solely With Practicals
- Combining Practical Lighting With VFX
- 3 More Creative Practical Lighting Methods
- Lighting Different Times of Day
Cover image via Paramount Pictures.


