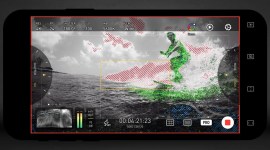
14 Video Editing Tips for Cutting a Documentary
From file management to lower thirds, these fourteen video editing tips will help you shape your documentary film.
Weeks, months, and sometimes years after you’ve captured all your footage for a documentary, you have to put it together. Whether you captured everything you needed or not, miracles can happen in the editing room. So can disasters, but let’s focus on the positives.
In the editing room, you’ll find the story and put it together to craft a narrative. Of course, that’s after you’ve done the tedious work of organizing and backing up all of your footage and transcribing interviews. Then, you can start making action cuts, L cuts, J cuts—all the cuts. Have fun.
Kidding aside, cutting a documentary takes time, patience, and skill. We can’t help you with that. What we can do is offer advice. Below you’ll find fourteen tips for cutting a documentary.
1. Back up Your Footage

Whether it’s because you misplaced the storage device or the data corrupted, losing footage is never ideal, especially when shooting a documentary. You just can’t recreate some scenes. You need to back up footage to ensure that it doesn’t get lost. Ideally, you’ll want to back up footage in at least two separate locations.
Backing up footage at the office is the obvious choice, but don’t forget to also back it up on a portable drive, such as a portable SSD. That extra layer of protection secures the files if the original is deleted, lost, or corrupted. Using the cloud as a secondary option is also a good idea, and it allows access to your footage from wherever there’s an internet connection.
2. Organize It All

Having an organized file structure makes it easier to find everything you need later on. You can create an in-depth file structure, breaking up all your footage and assets into a specialized folder. Or, you can use Digital Rebellion’s PostHaste, a piece of free software that creates file structures based on your project. It’s available to download for PC and macOS devices.
Though the software is a huge timesaver, it doesn’t do miracles. You’ll need to put all the files in the folders yourself, but at least you’ll know where to put them. Tori’s piece on footage archival is an excellent read, diving into the pros and cons of physical versus cloud storage and how to organize files.
3. Transcribe Every Interview
I’ve done my fair share of interviews over the years, and transcribing is second nature at this point. Doing it isn’t fun, but it helps a lot down the road in two ways. First, it helps me become more acquainted with the interview, picking up interesting quotes that I may have missed the first time around. Second, finding any quote is as easy as searching for a keyword within Google Docs or Word. Transcribing everything will take some time, especially when talking about transcribing interviews for a feature-length documentary. But, it’s worth it. You’ll also want to place a timestamp after every quote so you can quickly locate it within the footage.
If you have the budget, hire someone to help. If that’s not in the budget, I suggest using Otter, which is free for the first 600 minutes of audio it transcribes every month. The app uses AI to transcribe in real-time, and it also works on uploaded recordings. Apart from adding timestamps, it knows who’s speaking, though you’ll have to identify the people before it can attribute lines to them. If Otter messes up, you can edit within the app. The Pro version is $100 for one year, and it’s worth every cent, with 6,000 minutes of transcription every month.
4. Use Close-ups and Medium Shots over Wide Shots

How a shot is framed matters. Framing too wide for anything other than an establishing shot can lead the viewer to wander and lose the plot. You’ll want to use medium shots for most interviews. A medium shot frames a subject from the waist up. The medium shot feels the most natural when a person is talking, but when you emphasize or add tension/drama to a scene, the close-up is the way to go.
A close-up frames the subject above the neck, but it can sometimes just frame the subject’s face. The close-up can also be used as a way to transition between interviews, which feels less jarring than transitioning between two identically-framed interviews. The close-up is also perfect for capturing and highlighting small details.
5. Avoid Jump Cuts with Multiple Camera Angles or B-Roll

People don’t speak perfectly like in the movies. Real life is rife with filler words, such as “umms” and “ahhs,” which you’ll have to edit out. The problem is that cutting out those filler words mid-sentence results in jump cuts. Jump cuts look unprofessional, and while they may get a pass on YouTube, documentaries are different.
One idea is to cut to a different camera angle when you need to make a cut. The problem is you need to shoot an interview with multiple cameras, which can eat into a tight budget.
The other solution is to cut to B-roll instead, which adds context to the story. When an interview subject says “ahh,” cut to a close-up of their hands, a cityscape, a bowl of fruit. It doesn’t matter, though it should be somewhat related to the story. It’s better to cut to something that visualizes what the interview subject is saying. If they’re speaking about their childhood, maybe cut to a picture from their yearbook or a home video. You get the idea.
6. Cutting on Action
Much like low-quality sound, viewers only notice bad transitions when done poorly. Cutting on action is one of the most straightforward cuts for a seamless transition. As the subject moves and grabs the viewer’s attention, that’s when you cut to the following clip, and no one’s the wiser. When I say action, I don’t mean movie action. It’s more like motion, and it can be something as simple as an interview subject looking off-camera or shifting in their seat.
7. Lead into the Next Clip with a J Cut or L Cut
The J cut leads into a clip by extending its audio to the preceding clip. If you’re showing B-roll, start playing the audio for the next clip, then match the audio with the matching video. You can see an example in Logan’s video above (#3 1:05). This kind of cut is everywhere on TV shows and movies, but most people don’t acknowledge them because they’re so smooth.
The L cut (which you can also check out in the video above) is the opposite of the J cut. To perform an L cut, cut to the next clip while the preceding clip’s audio is still playing. This creates a temporary audio overlap that ends up feeling seamless, as well.
Both of these cuts are excellent ways to transition naturally.
8. Keep Graphics and Lower Thirds Easy to Read and Bring Them up More than Once
Want to make your documentary look more professional? Add lower thirds. These titles can introduce interview subjects, locations, and time. You’ll want to choose something that fits with your project. You can start with our 15 free lower thirds or learn how to make one.
One of my pet peeves about documentaries is that I forget everyone’s names halfway through if there are too many interview subjects. Sometimes, the period between appearances for interviewees can be an hour or longer, by which time I’ve forgotten who they are and how they relate to the story.
I know I’m not alone, and the fix is simple. Just bring up the lower thirds introduction a few times throughout the film for each character, especially if more than thirty to forty-five minutes have elapsed. And, take it easy on the motion graphics. A simple lower third with a drop shadow will do just fine.
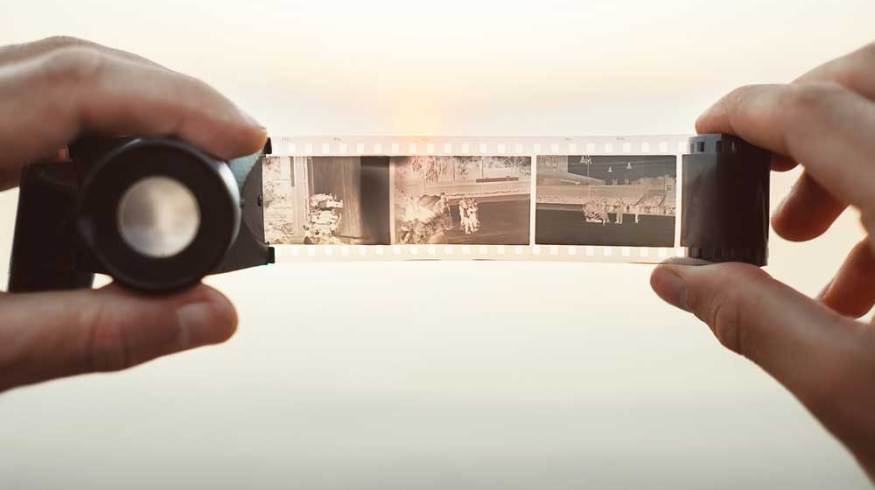
9. The Ken Burns Effect—Use Photos When You Don’t Have Footage
Ken Burns is one of the most successful documentary filmmakers in history. One of the tricks he often employs is rightfully deemed the Ken Burns effect, which is the simple effect of zooming or panning an image—common practice seen in many documentaries. Zooming and panning add motion to an otherwise static shot of a single image, making the shot more visually interesting. While the Ken Burns effect is used mostly out of necessity due to a lack of footage, it’s still effective at providing visual context to the viewer.
While the specific steps to recreate the effect will vary between NLEs, the process is simple enough. On DaVinci Resolve, I open up the Inspector tab on the Cut page, click the Video tab, and under Transform, I create a Zoom keyframe at the beginning of a shot, zoom in, and then create another keyframe at the end. To pan the shot, I do the same with the Position setting.
10. Kill Your Darlings
Back when I took a creative writing class, my professor always told us this. Killing your darlings is knowing when to let go for the sake of the project.
In Werner Herzog’s Masterclass, especially the episode on editing, he says something along the same lines. He discusses how, in the editing room, you may find scenes that you loved while shooting but just don’t fit anymore. Instead of shoehorning it where it doesn’t belong, it’s best to kill your darlings at that point. He also mentioned that he’s ruthless with his editing, and deletes his outtakes completely after finishing a project. That may be taking it too far, but he’s not wrong. Be ruthless, trim the fat, kill your darlings.
11. Construct a Narrative
In Ken Burns Masterclass, there’s a chapter on crafting narratives that is a must-watch, where he says that he and Steven Spielberg approach writing narratives in a similar fashion, except that Spielberg can make it up.
Though fiction provides unlimited creative opportunities to craft a narrative, there’s a lot of room for creativity within non-fiction storytelling. Crafting the narrative is telling a story, and every story starts somewhere. You need to find that starting place and cut the footage together in a way that tells a story with a clear beginning, middle, and end. Real life has a way of unraveling unpredictably. Your job is to pull on every thread until the story unravels itself. Find the narrative that’s already there.
12. Use Music to Set the Tone

In filmmaking, music is as important for setting the tone as anything else, and it’s no different when making documentaries. Unlike film, however, music in documentaries is often more subtle. What some would call “cinematic” music—lots of strings and piano. When done right, the music feels natural. These types of tracks fade into the background, but still convey emotion and punctuate the scene. Here are some things to remember when picking music for a documentary film.
PremiumBeat has a huge selection of such tracks, and they’re easily searchable from this very site. Just hit the “Music” link at the top of this page and search for what you need. You can search for songs based on mood, genres, instruments, or by keywords such as “documentary,” “cinematic,” “film,” and so on. Take a listen.
13. Use Stock Footage
Stock footage can help any project. Whether you forgot to capture B-roll for a specific scene or need an establishing drone shot of a city, Shutterstock can help. Shutterstock has thousands of royalty-free clips in both 1080p and 4K resolutions, ranging from nature footage to slow-motion clips to incredible animations.
For productions on a tight budget, licensing stock footage may be more cost-effective than traveling to capture B-roll or renting special equipment, such as a drone or high frame rate camera for slo-mo shots. Use Shutterstock’s search bar to find what you need.
14. Walk Away for a Fresh Perspective
Sometimes, you need to go for a walk, have a cup of coffee, or splash some water on your face to separate yourself from the work. It works. I can’t tell you how many times I’ve walked away from a writing project only to return hours later energized and with a fresh perspective. When you’re in deep editing, it’s essential to step back and not lose sight of the forest for the trees.
Don’t take the work home with you, either. In Cal Newport’s book Deep Work, which I recommend every creative read, he makes a case for strictly mapping out your work hours and only doing work—deep work—in those hours. He says that thinking about work drains you mentally, zapping you of your energy for the next day. When it’s time to work, get rid of all distractions and do just that. Afterward, forget you have a job and enjoy your life. Let the mind rest until tomorrow.
For more filmmaking tips, tricks, and advice, check out these articles:
- Iconic Cinematography: Our 5 Favorite Shots from Reed Morano
- Video Editing 101: How to Edit a Video from Start to Finish
- Tips from Renowned Cinematographers for Your Next Film
- Iconic Cinematography: Our 5 Favorite Shots from Bradford Young
- Tips for Keeping Your Camera Cool on a Hot Summer’s Day
Cover image via Soloviova Liudmyla.