
Learn How to Create a “Deakinizer” Tilt-Shift Effect in Resolve

If you want to age your footage and immerse your audience in an older world, check out this Deakins-esque tilt-shift technique.
The internet is full of tutorials on creating tilt-shift effects in After Effects, Premiere Pro, Final Cut, and so on. These tutorials document methods that use various masks and blur layers; however, you can’t quite beat using a one-and-done plugin.
In DaVinci Resolve 14, you have precisely that. Unfortunately, this effect is only available in the studio version of Resolve 14—you can’t have all the cool things for free.
I typically recommend applying effects that will affect the image on the color page (see why here). However, with the tilt-shift effect, there are so many control parameters that I prefer applying the effect on the edit page, where you can fully extend the inspector panel.

The effect, which is confusingly categorized under ResolveFX Stylize instead of ResolveFX Blur, is relatively straightforward. There are four control areas, and each setting speaks for itself.
The tilt-shift effect itself doesn’t require a rundown. It is, as I mentioned, a one-and-done effect that produces excellent results. However, we want to create the Deakins-style tilt-shift seen in The Assassination of Jesse James by the Coward Robert Ford.
If you have yet to watch that film, please stop everything you’re doing and watch it (it’s currently included with an Amazon Prime subscription).
Throughout the film, several shots feature a tilt-shift, color aberration, and vignette [in camera]. These shots appear primarily in transitional moments, and the idea was to evoke the feeling of old-time cameras.
It’s a visual feast of cinematic beauty.
In an interview with American Cinematographer, the esteemed cinematographer Roger Deakins said the following:
That was done entirely in camera with lenses that are now called ‘Deakinizers.’ I used to use this gag where I put a small lens element in front of a 50mm to get a similar effect.
I went to Otto Nemenz and asked how we could create that effect in a better way, with more flexibility and lens length. The lens technician suggested taking the front element off a 9.8 Kinoptic, and also mounting the glass from old wide-angle lenses to the front of a couple of ARRI Macros.
Otto now rents out three Deakinizers. Removing the front element makes the lens faster, and it also gives you this wonderful vignetting and slight color diffraction around the edges.
We used different lenses, so some were more extreme or slightly longer than others. Sometimes, we used [Kardan] Shift & Tilt lenses to get a similar effect.
– Cinematographer Roger Deakins
So, it’s not necessarily just a tilt-shift—there’s an abundance of different things happening, but we can use the tilt-shift effect in Resolve as a starting point.
The Rundown
With Resolve open, navigate to the timeline, and find (or import) the clip that you want to Deakinize. Open the Effects Library, and add Tilt-Shift Blur.
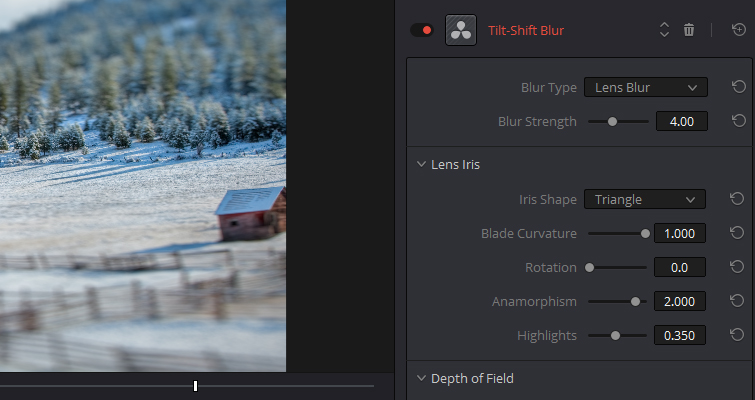
You now need to open the inspector and switch from Video to OpenFX to adjust the settings of the effect.

For the most part, we can leave the majority of the sliders where they are, as there are only a few things we need to change.
We’re going to change the Iris Shape to a triangle. This creates a more attractive-looking tilt-shift. Underneath is Blade Curvature, which will round off the edges of the iris shape we’ve selected. We’re going to increase this to 500.
Anamorphism is a setting linked to aspect ratios and anamorphic lenses. However, if we increase the amount, it gives our blurred area a slight push—somewhat like a motion blur that you can find in Photoshop.
We’re going to double the strength to two.
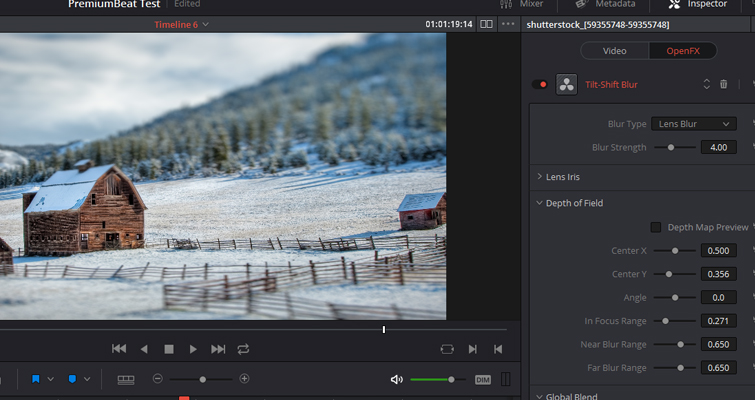
The depth of field will control where the tilt-shift falls on your image. Therefore, this menu and the settings you adjust will depend on your subject, as every shot is going to be different.
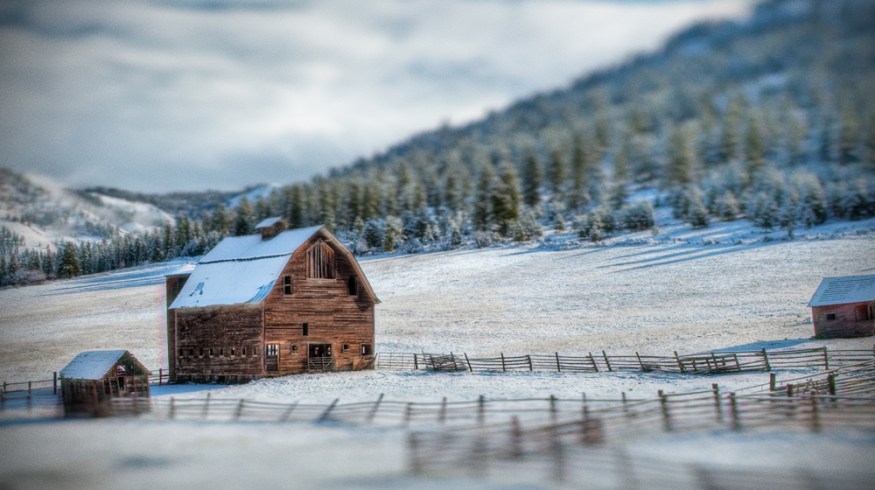
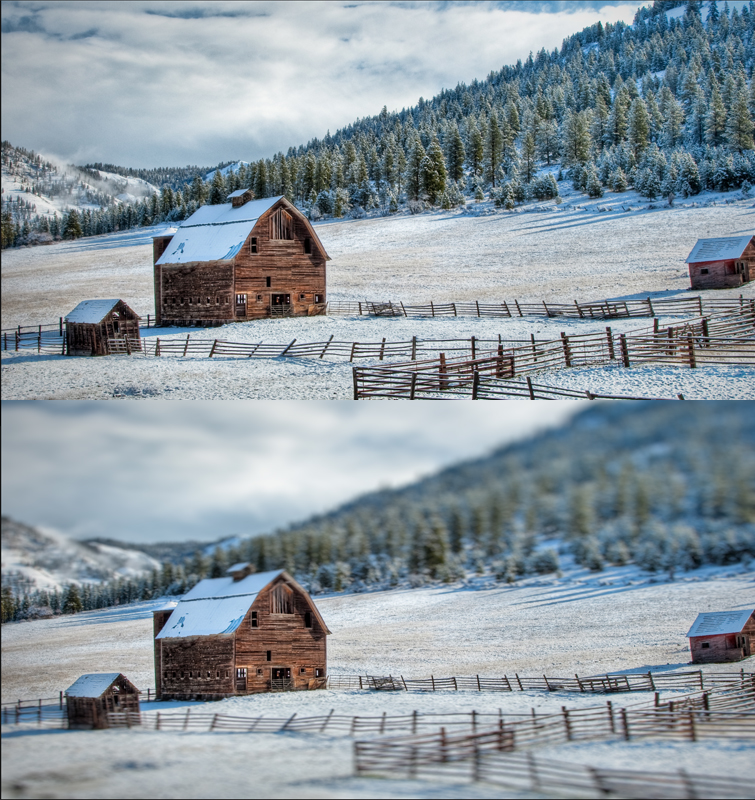
In the example we’re using today, I’m only going to move the Center Y adjustment, so the in-focus area is perfectly aligned with the barn.
This is the before and after.
It’s not quite Jesse James-like just yet. We’re going to add a secondary effect that works so perfectly, it feels like it was created only for this tutorial—the Prism Blur. That, too, is under the ResolveFX Stylize menu.
Add the effect to your clip, and jump back over to the inspector panel. You may notice that there are no control settings visible for the Prism Blur; that’s because Resolve doesn’t want to interrupt our editing of the tilt-shift blur.
Therefore, we must double-click on the Prism Blur effect, and the settings will pop open.
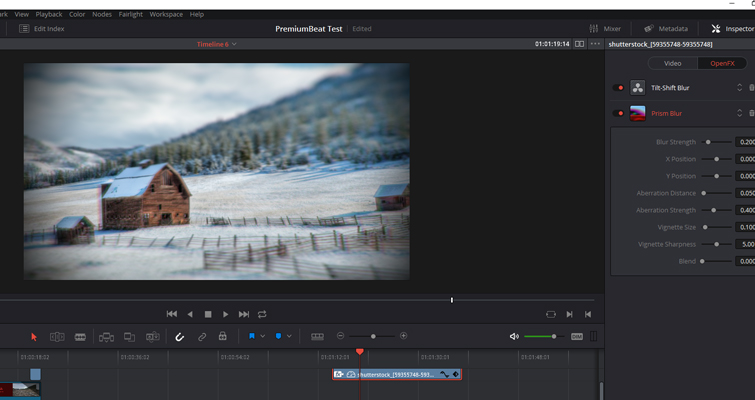
At first, the settings are a little too strong. We need to fix that. As we already have a tilt-shift effect, we can decrease the Blur Strength to 0.
The Aberration Distance is a creative setting that will depend on what you want to achieve from your shot. But, in this example, we want to decrease the strength by half.
Likewise, the strength of the vignette is also too strong. If you look at the reference images from Jesse James, the vignettes are only slightly visible.
So, we can decrease the setting for the Vignette Strength by half, too.

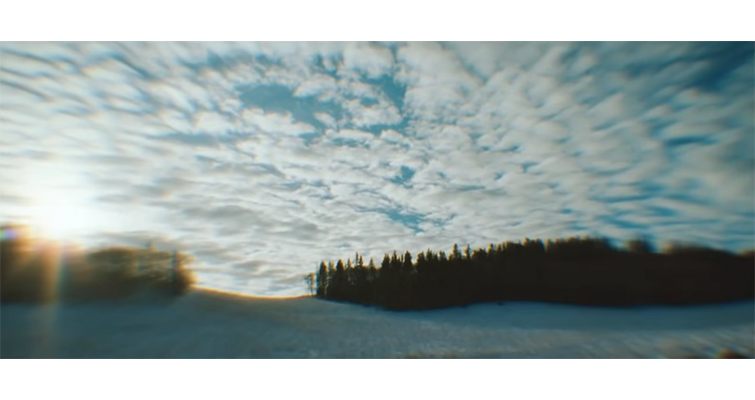
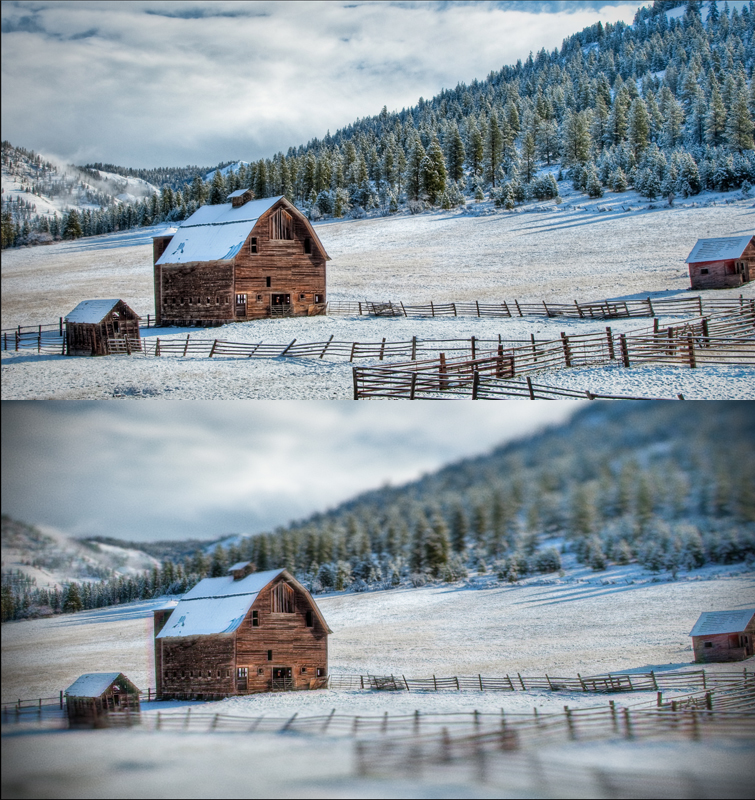
This is the before and after with a dash of added film grain.
Although there’s nothing quite like the real thing, and I’m sure several optical elements cannot be reproduced in pre-production, this is the next best step for those without the tools.
Lewis McGregor is a certified BlackMagic Design DaVinci Resolve Trainer.
New a few more cinematic gems for your toolbox? We’ve got you covered:
- 5 YouTubers to Follow for Creative Cinematography
- Filmmaking Trends: Why Shallow Focus Cinematography Is Here to Stay
- Iconic Cinematography: Our 5 Favorite Shots from Reed Morano
- Underwater Cinematography: Action Cam or Underwater Camera Rig?
- Iconic Cinematography: Our 5 Favorite Shots from Bradford Young
Cover image via Warner Bros.


