How to Create Specific Lighting Schemes for Filmmaking in 3D
Understand the role of lights on a movie set to build your foundation for more advanced lighting rigs on 3D creations.
Whether you are a filmmaker, a 3D lighting artist, or a hobbyist, it does not matter! This article will help you understand the importance of creating solid and robust lighting schemes in your 3D renders.
In particular, we’ll be focusing on a few lighting schemes common in practical filmmaking.
As you probably know, studying a proper lighting setup in a scene helps convey a certain mood. However, it’s not just a matter of adding lights here and there. There are good practices and elements that contribute to reaching a specific atmosphere, such as:
- The presence of hard vs. soft shadows
- A high key-to-fill ratio, which creates contrast and drama
- A low key-to-fill ratio, which is indicated for a more natural and relaxing lighting
- The light direction and position—for instance, a character lit from the bottom may appear spooky and worrying, while light from the top gives an entirely different appearance.
The previous list is not complete, of course. We’ll explain more about color schemes and other color-related aspects in the next episode.
Different Moods in Filmmaking
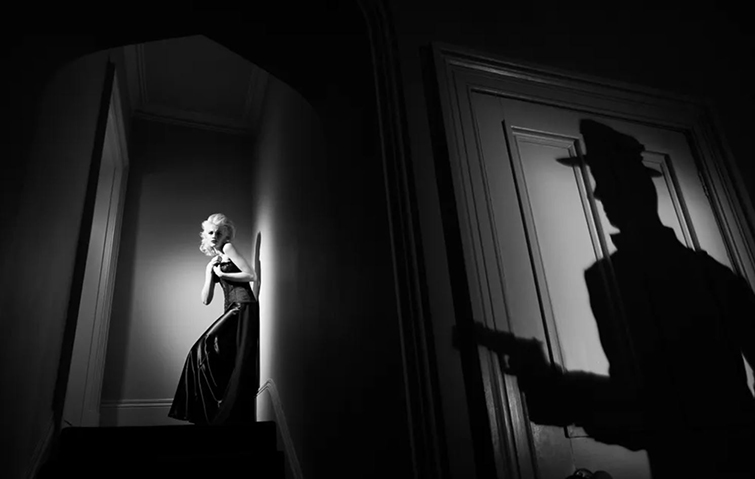
Film noir is an excellent example of hard lighting. The character silhouette is being revealed, and the presence of very dark areas is typically the key element for this kind of lighting.
Soft lighting, on the other hand, creates a different mood, with a good balance of bright and dark parts of the scene. In addition, shadows are not entirely dark and reveal a smooth transition to bright areas.
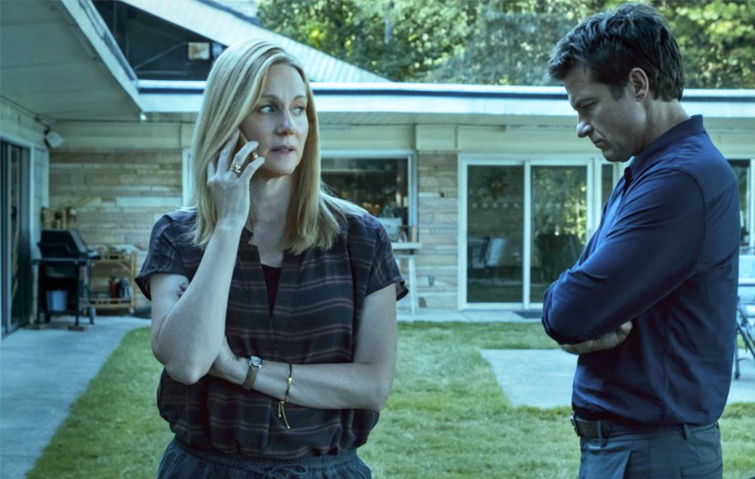
In the Film Noir example (where the key light is definitely more influential than the fill light,) there is more contrast, and the character pops up more in the scene. On the other side, when the light intensities are almost the same, what we perceive is more natural and, in some contexts, more relaxing (even though no scene in Ozark is ever relaxing).
Creating Lighting Schemes or Setups in 3D
When you approach 3D lighting, there are well-known schemes that come from filmmaking. From simple lighting setups, you can build up more advanced and custom configurations. The good news is that you aren’t bound to specific software; instead, you just have to know how light sources behave in nature!
For instance, a point light casts light rays in all directions, but the more you move the light back into 3D space, the softer the shadows. An area light is suitable for windows, apertures, or light panels. It is a perfect light source for diffused lighting without harsh shadows.
In a nutshell, knowing how light works help you have more control over your lighting setup.
For our demonstration, we’ll be using an example of a free 3D character from the web.
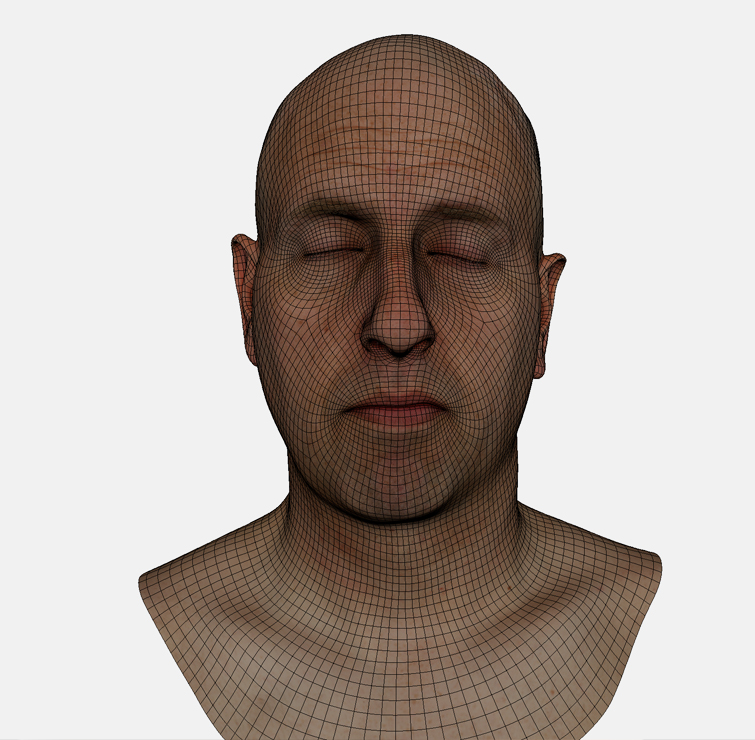
I created the following lighting setups that you can replicate on your own.
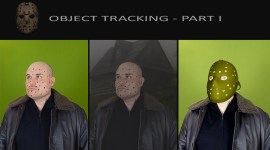
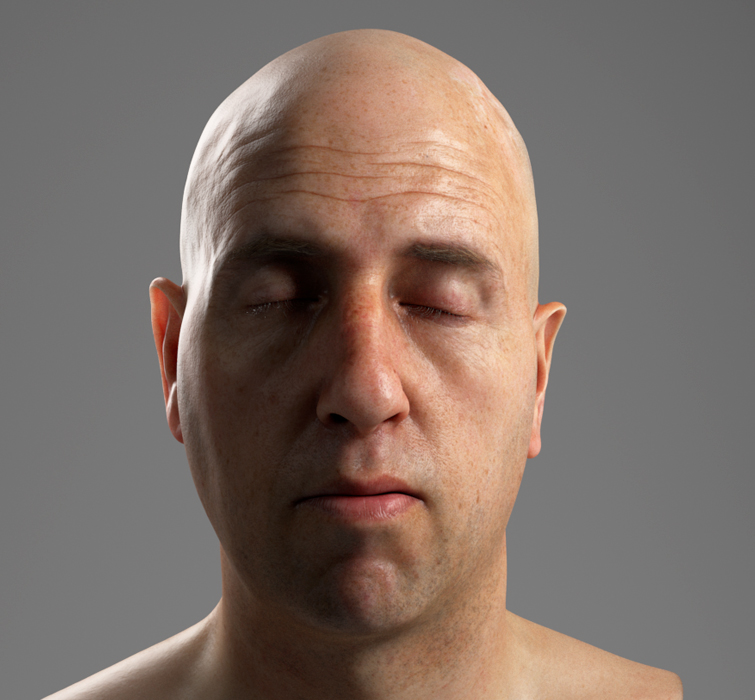
1 Point Lighting Setup
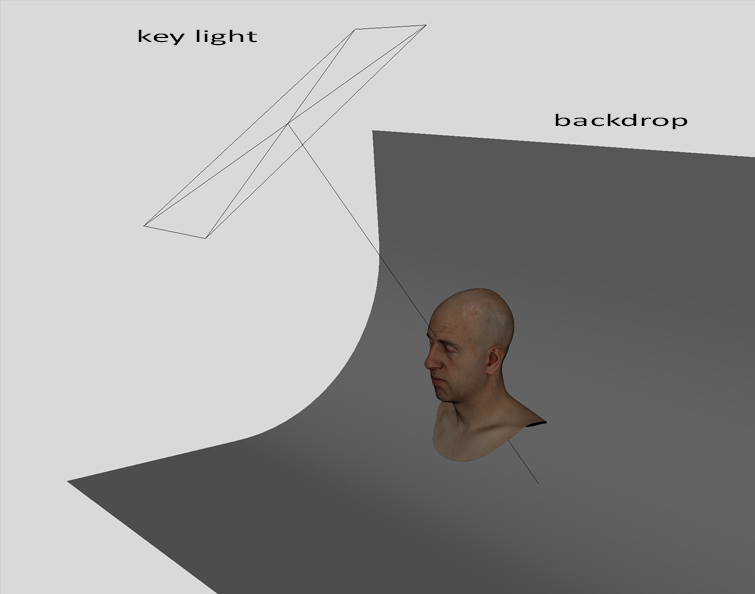
A 1 point lighting setup is the simplest lighting scheme and only requires a Key Light—the main and most important light source—which is responsible for revealing one side of your character. Consequently, the opposite side is dark. This light is usually placed 45 degrees from the side of the camera and 45 degrees up from the subject. There is a lot you can do with a high-key lighting setup and its very common in the filmmaking world.
In your software, an area light is usually the best option because of its simplicity. You can scale it up to:
- include more portions of the subject
- make the shadow softer with ease
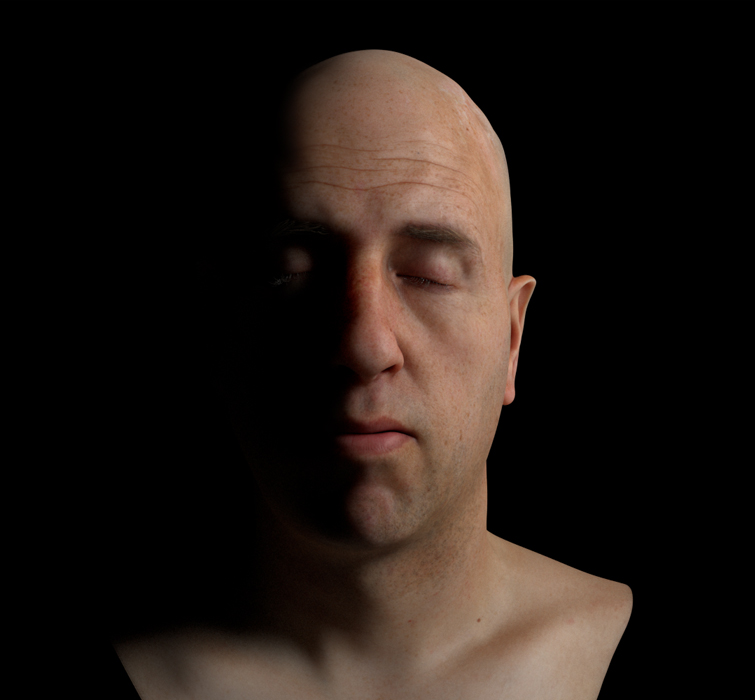
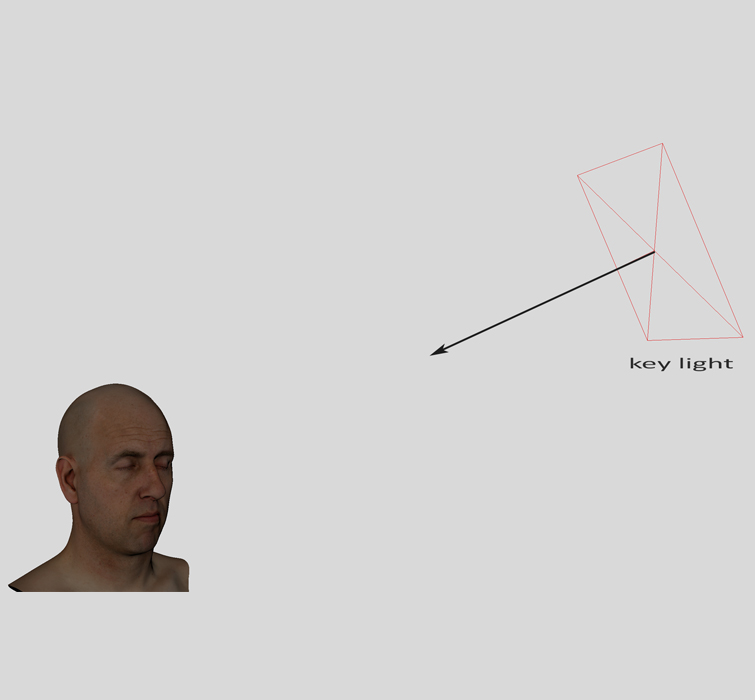
What is this lighting scheme ideal for?
- Film noir or dramatic shots where just one part of the character is being revealed
- Shots where you want to give more emphasis on a character or create a Chiaroscuro effect, like in Caravaggio’s Italian paintings
2 Point Lighting Setup
This scheme adds Fill Light which is opposite to the key light. The effect will reveal the dark areas of the shot. The Fill Light is generally about half as bright as they key light. You want to retain some shadow but just soften it a bit.
Nonetheless, you can always balance the two light intensities by deciding on a proper key-to-fill ratio.
As for the 1-point lighting, you can add an area light here and scale it appropriately.


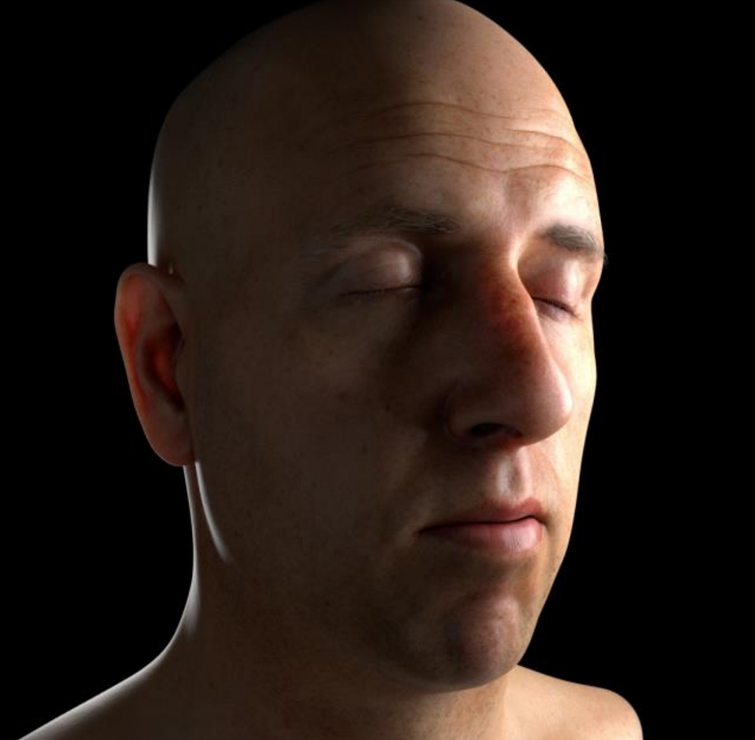
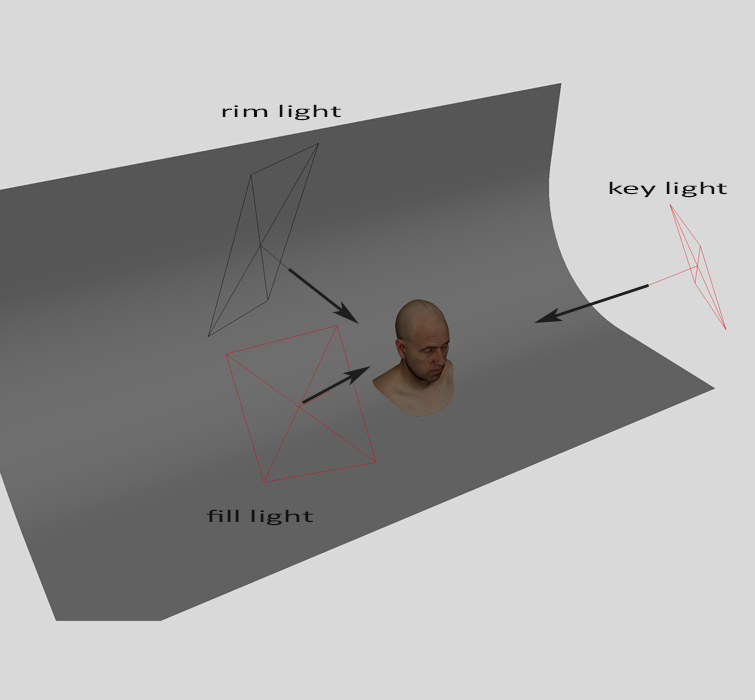
3 Point Lighting Setup
This is one of the most common lighting setups in the filmmaking world.
If you add a third element like an area light at the back of the character, called Rim Light (also referred to as a backlight), you can:
- Separate the subject from the background
- Create more vibrance in the materials and textures
There are no specific rules for the position of the Rim Light or Backlight.
- You can put it just behind the subject to reveal the character’s silhouette.
- If the light is oriented towards the ear, it might create a subsurface scattering effect, which is pretty cool! Hair can produce the same effect too.
- When the light contributes to an important portion of the character’s face, generally the side, without revealing just the outline, it is called Kicker Light.
Furthermore, the rim light can either create a soft light, like in the following example or a hard light on the outline.
It’s easy to notice the 3 lights in action. Specifically, the Rim Light behind the ear creates a translucency effect, revealing the presence of veins and capillaries.
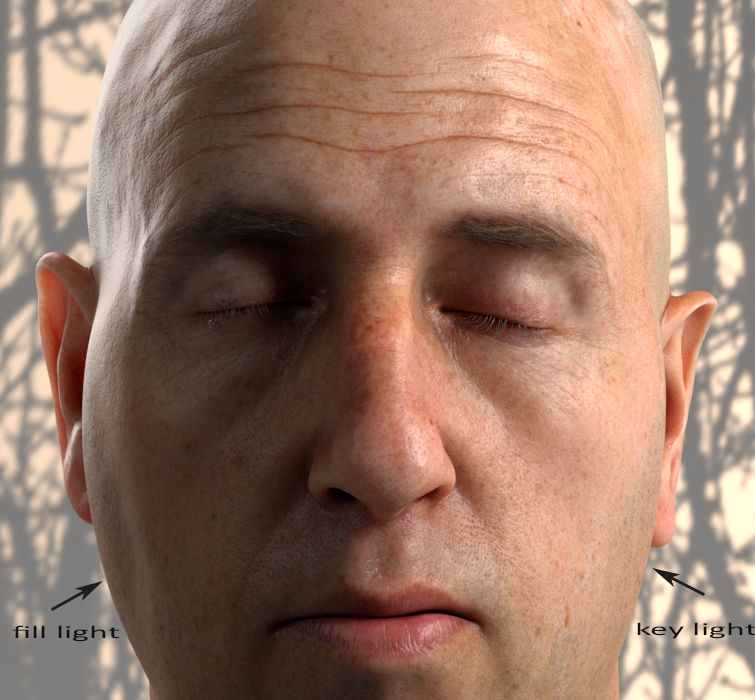

In the previous two renders, we also used a backdrop with a projected image—aka gobo. We’ll go deeper into that in a moment.
When you add a fourth light pointing towards the background, you are introducing a four point lighting setup. In this case, you want to give importance to the background too.
Remember that the presence of a backdrop also allows adding bounce lights, which are what we need to make your render even more interesting.
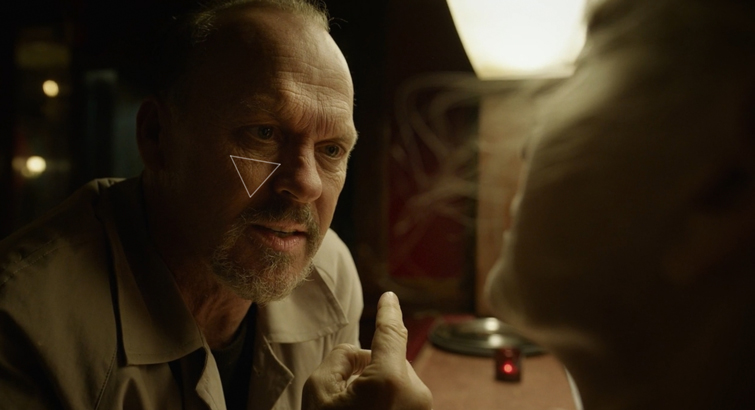
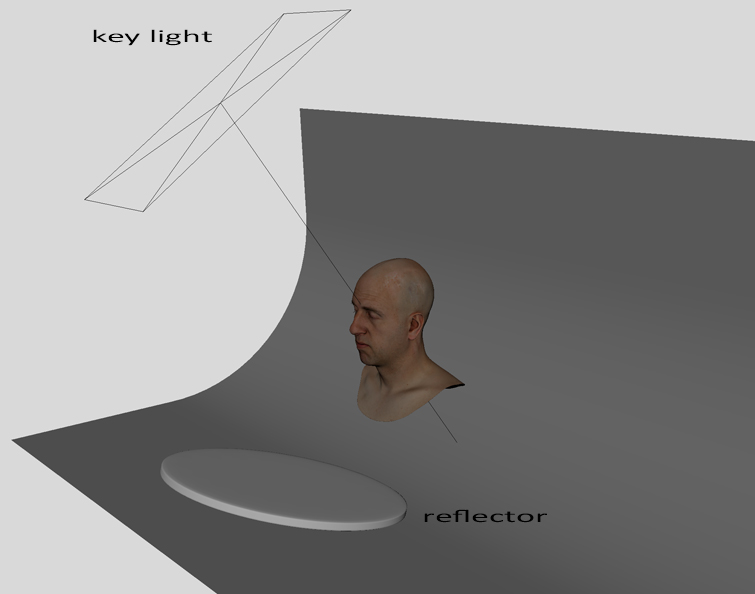
Rembrandt Lighting
This standard lighting scheme comes from a Dutch painter, Rembrandt. This creates a triangle of light under the eye of the subject, on the less bright side. Rembrandt lighting is very popular in filmmaking, and the movie Birdman or (The Unexpected Virtue of Ignorance) has at least one excellent example.

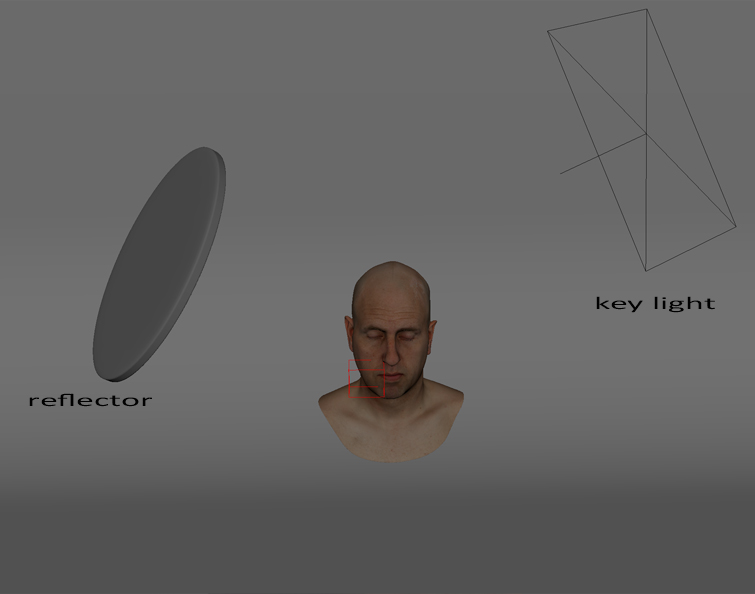
Let’s see how to create it in 3D! We generally have:
- A Key Light is typically positioned at a 45/50° degree angle which creates the triangular pattern
- A Fill Light or, in this case, a reflector, which takes the incoming light (from the key light) and makes it reflect the character
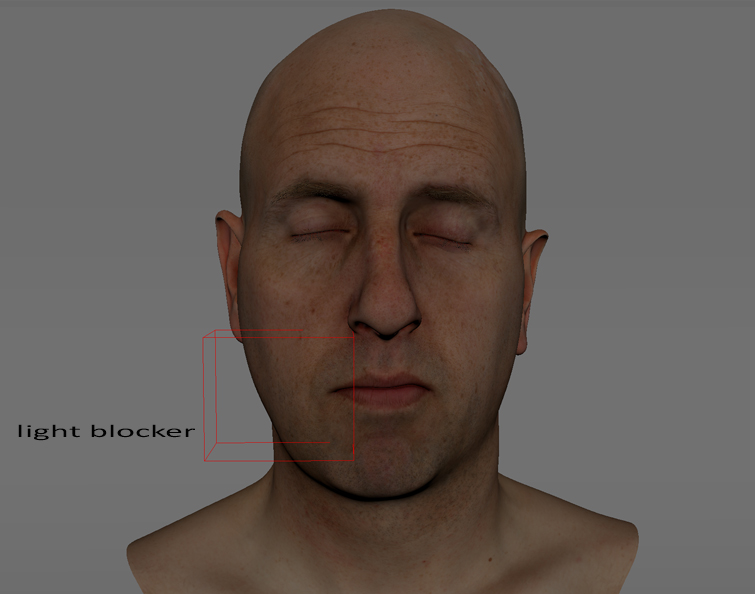
Additionally, In 3D, a light blocker may help you refine the shape of the triangle—you block some of the light that may be present under the cheek. A light blocker simply removes light falling inside it, much like a screen in filmmaking.


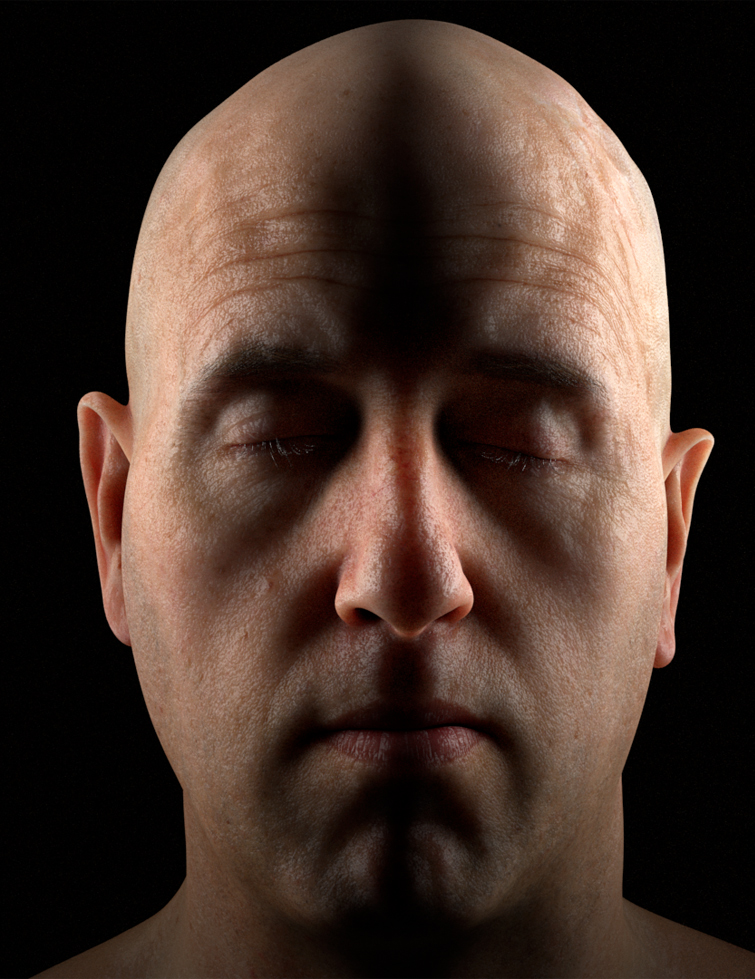
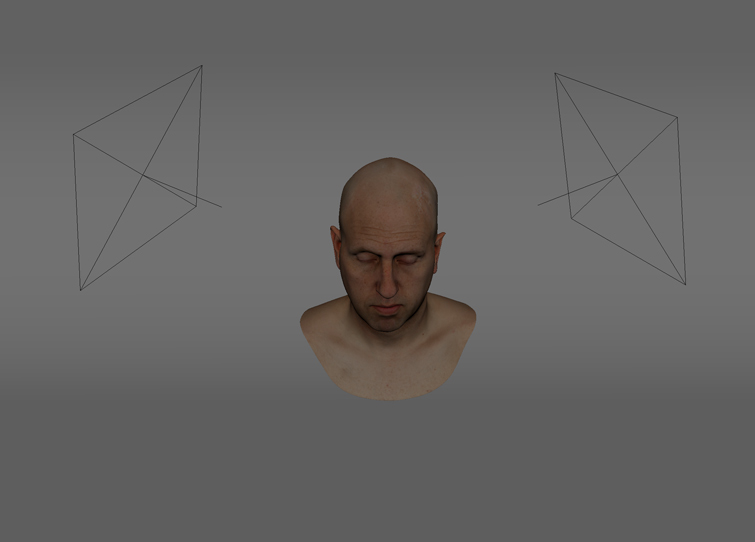
Butterfly and Badger Lighting Schemes
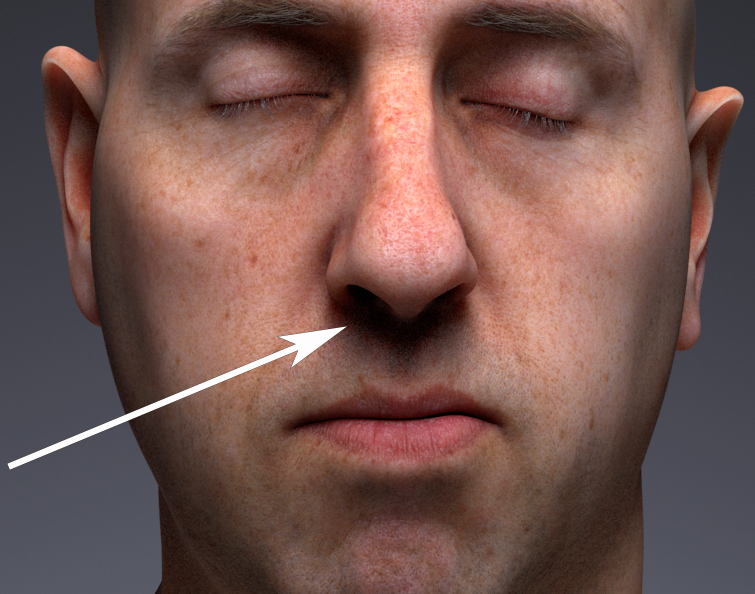
Also called Paramount Lighting, the butterfly lighting scheme is extensively used in portrait photography. The idea is pretty simple, though! You must create a Key Light above the subject and have the light pointing downward.
This effect produces a shadow under the nose and sometimes under the chin, resembling a butterfly’s shadowy silhouette. You can also place a reflector under the subject’s head to have some bounce lighting (a fill light effect) if you feel the shadow is too dark.
The Key Light can be applied by using an area light because of its diffused nature, but if you want to experiment with a spotlight and play with shadows, you are free to do that. Playing around inside your 3D software is the best way to learn, so try a few different methods.

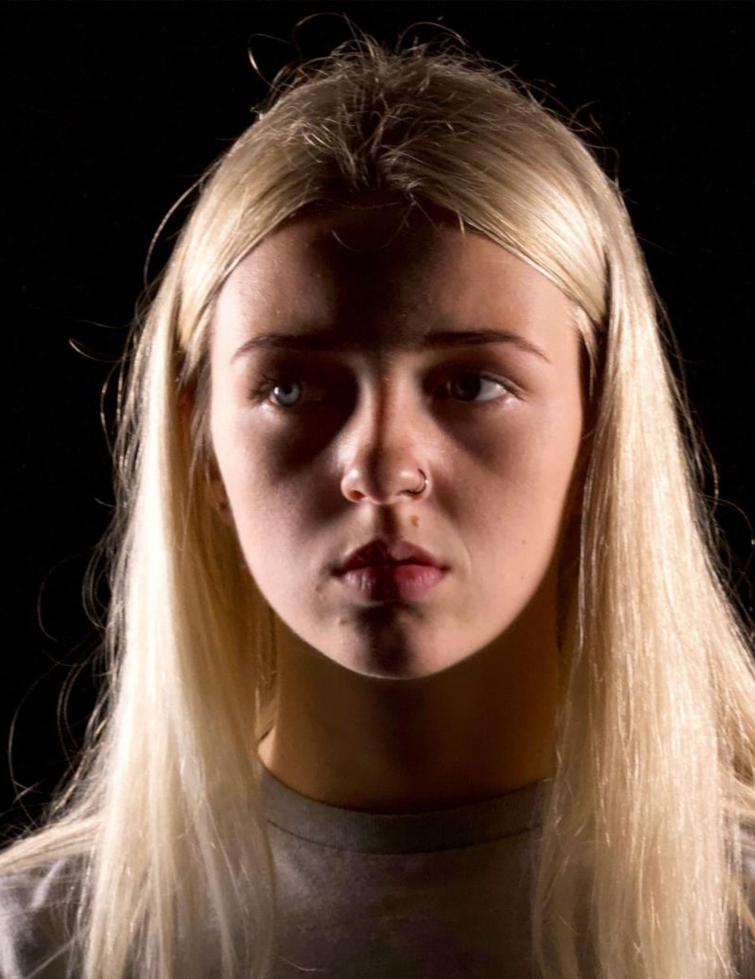
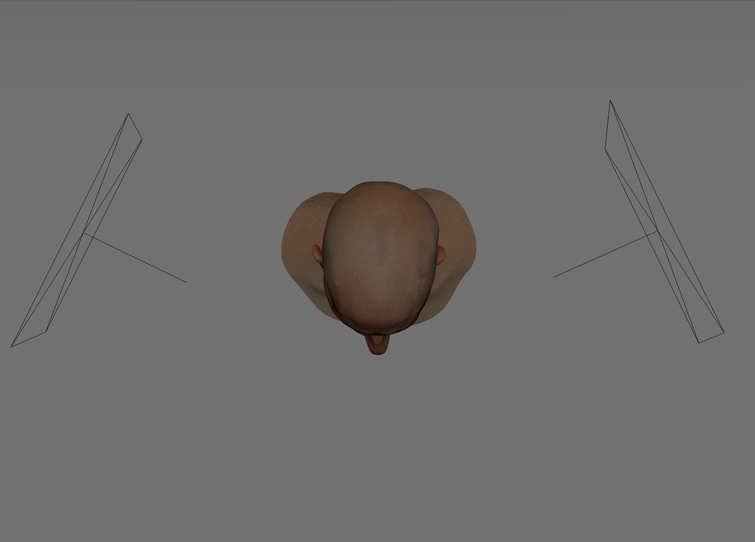
A badger lighting setup, also known as Doubleback Lighting, creates an exciting and dramatic effect. The goal is to emphasize the presence of shadows in specific subject areas.
Shadows can be either soft or a bit harsh, but the final effect creates a strong impact on the viewer.
Starting from a reference image, I tried to replicate the presence of shadows primarily visible on the forehead, under the eyes, and on the chin. The result has contrast and a bit of drama!
The most difficult part of the badger lighting setup is to find a proper position and orientation for the two area lights at the back of the subject. They have to produce the following shadow pattern.
Creating your own Lighting Scheme
Now that you know how conveying a particular mood is vital and choosing a proper lighting rig, it’s time to talk about custom lighting schemes. The aforementioned setups are fantastic, but lighting is an art and not based on strict rules.
For instance, you may have situations where:
- The environment is as important as the main subject and has to be lit with practical lights (like lamps and candles). You can also enrich your lighting with additional off-screen light sources to create exciting atmospheres.
- Naturalistic lighting is the main setup to create. Therefore not so many artificial lights but skylights and sun, for instance.
- The main subject needs to be strong in the composition. That means you can freely use more than one rim light—maybe two or three from different sides, with different intensities and colors.
- You want to have more control over the global illumination. Consequently, instead of letting the renderer calculate all the indirect bounces, you may add custom bounce lights. This might be a long process, but it creates space for creativity.
Sometimes it is also good to start with a known lighting scheme, as seen before, and end up with a more advanced one.
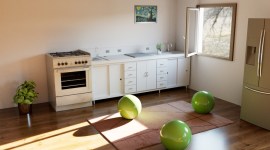
Let’s now see an example of a custom lighting setup that I created for a scene.
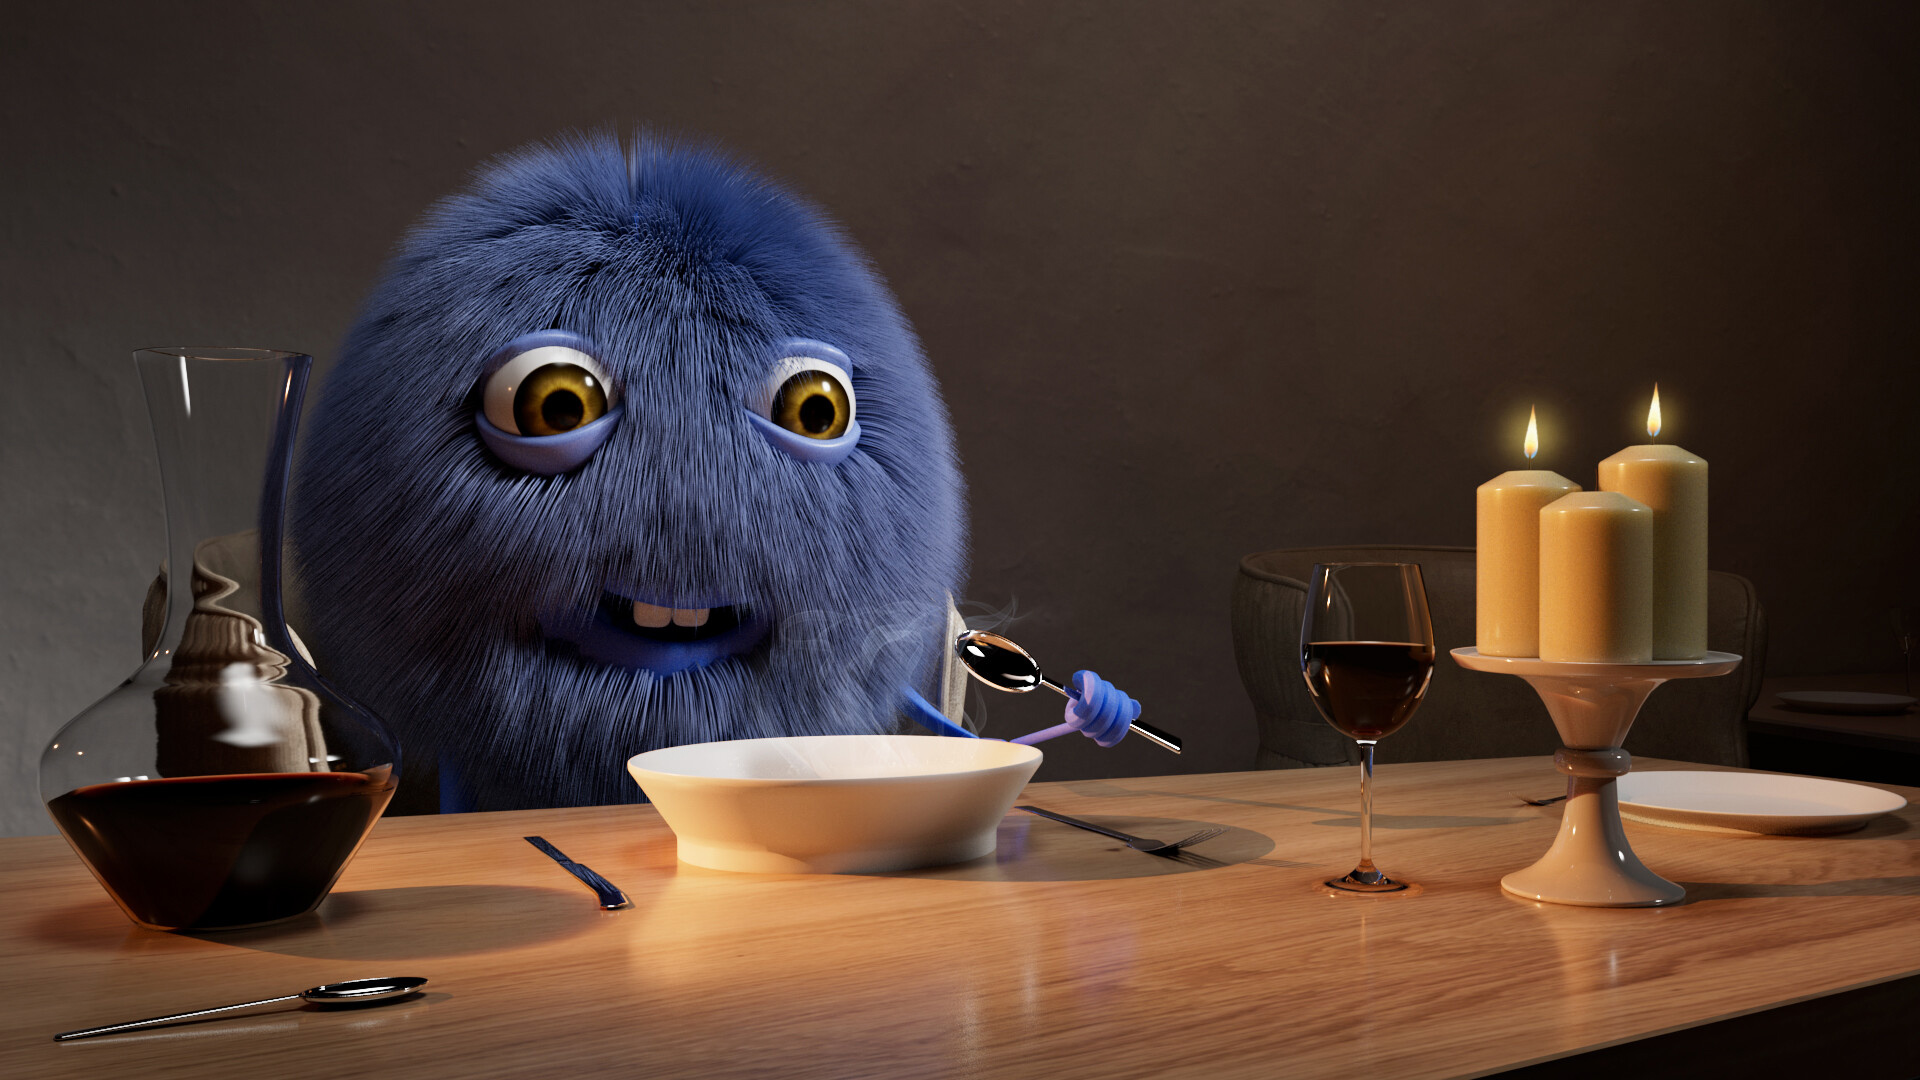

The intention is to capture the central part of the composition—eating soup is, in fact, the main action.
Furthermore, I wanted to emphasize the fluffy nature of the character too.
Lights Involved
- Key Light: Coming from the left towards the table. Also referred to as an off-screen light (maybe a lamp). It’s the strongest light source and produces shadows on the table.
- Fill Light: Coming from the top and directed towards the character. The presence of indirect light bounces from the scene also increases the intensity on the character’s face a bit.
- Rim Light: Very soft light covering the silhouette of the character. While dealing with fur, a soft Rim Light is generally an excellent choice to enhance the quality of the hair.
- Background Light: A very soft light illuminating the wall behind. Remember not to increase its intensity a lot since the main focus is on the table.
- Practical Lights: Indicate artificial light sources which appear in the composition. They can be lamps, candles, and so on. I thought that a warm touch with flames was perfect in this shot!
- Bounce Light: This is not actually due to any light source, but it’s the result of light bouncing off of the table and diffusing in all directions. If you observe well, you’ll see the contribution of the bounce light tinting the white dish underneath. This effect is called color bleeding.
Naturalistic Lighting
This kind of lighting basically relies on natural elements like the sky and the sun. Nonetheless, nothing prevents you from adding additional lights to enhance the global illumination or underline the presence of a particular subject in the scene.
The following render uses a simple lighting setup that has:
- A Directional Light represents the sun
- A Sky Light which is good for filling the areas in shadow
- Very soft and Distant Low Fog, which is definitely the icing on the cake for big environments with visible elements on the horizon

Further info about creating the mood for an outdoor scene can be found here.
Motivated vs. Practical Lighting
Despite being quite similar, practical lights are generally the artificial lights in a scene, while motivated lighting is the effect of natural or practical lighting sources. Does it seem confusing? Let’s clarify it better.
In filmmaking, motivated lighting is a very effective technique that tends to accentuate the presence of light sources—both artificial and natural like a lampshade or the sun—or justifies the existence of a light coming from an off-screen source. Motivated lighting helps add contrast and create a more believable and cinematic shot.
Imagine a room at night with light coming from the window. That suggests the presence of a lamp post outside or headlights from a car.
Also, a man during a questioning, with a lamp pointing towards him, is an example of motivated lighting because the effect of the light on his face is motivated by the lamp.
In the following project, the main volumetric light is justified by the presence of an off-screen light source.
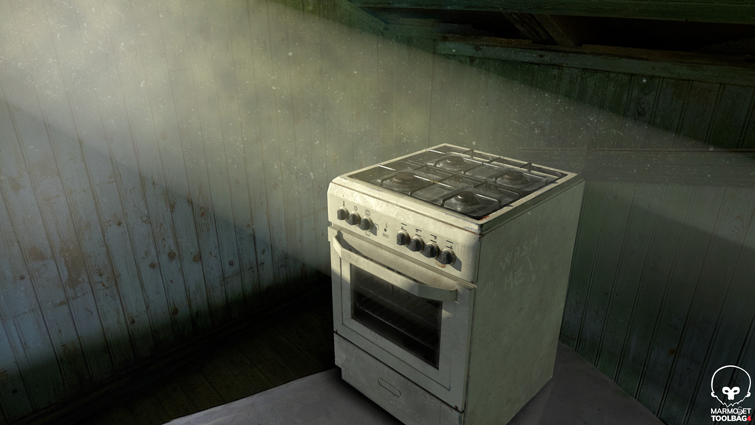
Practical lighting is a technique that simply considers artificial lights within the frame of a scene. Think of a TV, a lamp, a candle, or a neon sign, to name a few. Adding lights for those elements is necessary for building up motivated lighting.
Enhancing your Renders with Gobos
Another important element that may improve the quality of a 3D shot in filmmaking is the presence of gobos. But what do we mean by that? A gobo (or “cookie”) is an object put in front of a light source that projects a shape. However, there are also projectors with embedded gobos.
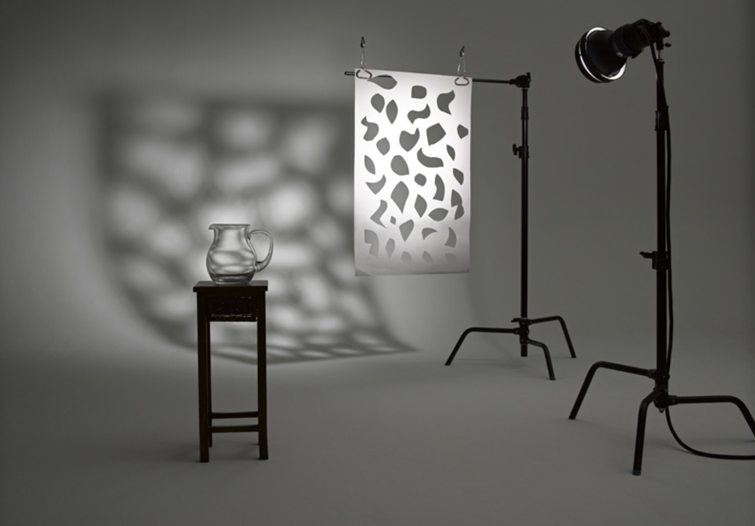
Generally, the presence of gobos in filmmaking has a double function:
- It provides more indications about the surrounding environment by simulating the presence of fake off-screen objects
- Consequently, the set appears more complex and richer than it is, with little effort.
- It makes the shot more attractive by enhancing the overall contrast.
In 3D software, many renderers provide some light filters to simulate that effect. Arnold, for instance, has a light filter called “gobo,” which can be applied to different light sources.
In the following render, I decided to use a tree image projected onto the scene from an off-screen light source.
This great technique allows you to save time by adding fake details to your environment.
As you probably learned from this article, building a robust lighting setup is not a piece of cake at all! It is a fine art and once you have mastered it your renders will have a new depth, texture and high quality feel.
We covered several techniques, starting from basic lighting schemes to more advanced setups and good practices used in filmmaking. Nonetheless, every filmmaker can build their configuration, but they need to know how lighting generally works.
As suggested, try observing many reference images or shots from professional productions and replicating the lighting in your 3D rendering software. That’s a good exercise!
That being said, I thank you for your reading and invite you to follow my Linkedin for more news to come!
Want more 3D tips, tricks and freebies? Check out the articles below!
- Unlock the Power of 3D in After Effects with Helium
- Best Site to Download 3D Models for Blender, Cinema 4D, and More
- Six FREE 3D Models for Cinema 4D Users
- The 10 Best Blender YouTube Channels for 3D Artists
- Create 3D Voxel Art with MagicaVoxel: FREE Project Files Included
- Create a 3D Card Effect in After Effects with this FREE Project File