Pro Tip: Exporting a Finished Video from Premiere Pro
Now that your edit is complete and ready for delivery, there’s one step left. Exporting a finished video with Premiere Pro.
Getting the hang of exporting in Premiere seems difficult with all the settings you’re confronted with in the export tab.
It’s not as complicated as it looks, though. With a bit of knowledge about codecs and sequence settings, you’ll be firing off exports in no time.
Step 1: Open the Export Window
To export a video in Premiere Pro, go to File > Export > Media. You could also press the shortcut key Ctrl + M on PC or Cmd + M on Mac.
Make sure the sequence you want to export is selected when you do this.
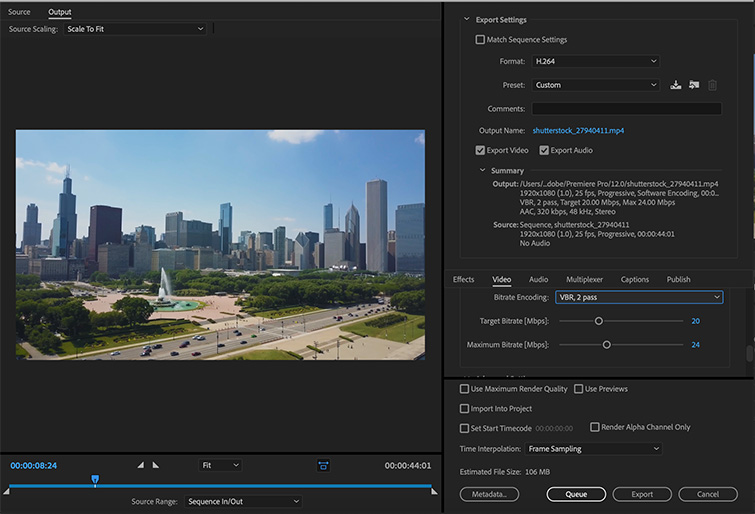
This will bring up your Export Settings window. In this window, you’ll select your desired settings (or presets) for the video before sending it to Media Encoder for exporting.
Before diving further into how to export a video efficiently, make sure you have any other apps closed, especially apps like Photoshop and Lightroom if you’re neck-deep in the Adobe-verse. This will help the rendering process exponentially.
Also, if you’re new to Premiere and curious about what the program can handle—both storage and power-wise—we recently explored this topic, listing out all of the spec requirements and what you need from a computer to work effortlessly in Premiere.
Check it out below:
Step 2: Choose Your Sequence Settings
When exporting a video, the first thing to think about is where the video will be delivered and how it’ll be viewed.
Are you going to upload to YouTube and Vimeo? Compressing down the video so you can send it quickly to a client? Or are you exporting a hi-res master version for presentation?
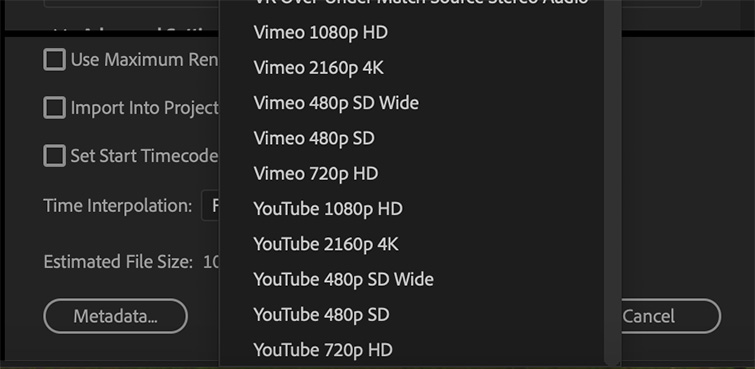
The delivery destination is essential in deciding what the settings need to be. There are loads of useful presets already installed with Premiere Pro and Media Encoder. You can use these presets to quickly choose settings for your exported file.
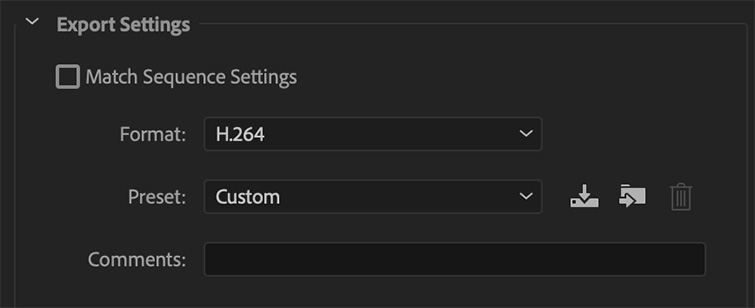
If you want to bypass these custom settings and export with the EXACT settings of your sequence, you can select Match Sequence Settings at the top. That’ll change your export settings to match your sequence settings exactly.
Although, I don’t recommend this because most delivery destinations require codecs other than your standard editing or intermediate codec.
Let’s say you get to this point in the exporting process, and things start to slow down. Or maybe you’re nervous about incorrectly exporting your video, and you’re scared to open up the timeline again for fear of crashing.
Be sure to double-check a few things before proceeding, or keep these tips in mind next time as you edit or before you start your edit.
Step 3: Establish What Platform You Will Be Exporting For
We’ll be exporting from Premiere Pro to upload to YouTube for this example. Premiere Pro also has presets for both YouTube and Vimeo that’ll export your project in the best-recommended settings for both.
However, for this example, we’ll be exporting with custom settings. It’s not that these other options aren’t viable solutions. I’ve found you benefit more from customizing your export so that there’s more universality to the final file, allowing you to upload it and send it to more places.
I hope that makes sense . . . moving on!
Step 4: Select a Format and Codec
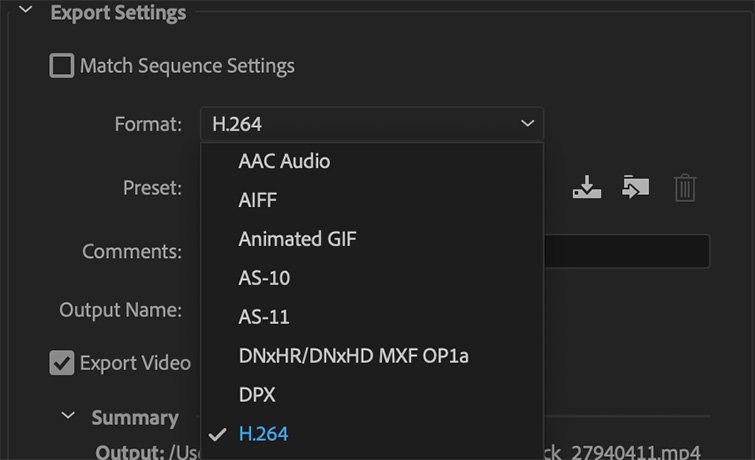
The best setting for web playback is the H.264 codec. So, we’ll select our format as H.264. That is also the most common codec for video exports through Premiere. For 80-90% of your exports, you’ll be using H.264.
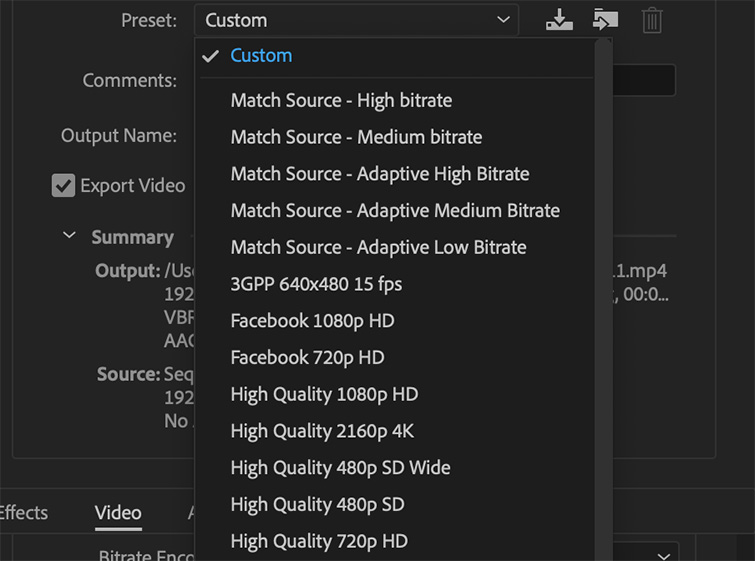
We’ll select a preset that matches our sequence and desired output. Our sequence is 1080p with a frame rate of 23.976 fps.
The next logical question if you’re new to all of this is: What is a codec? Or more so: How do I need to understand them for my workflow?
While it’s an entire world of explaining, I recently found a video that did a pretty good job of explaining it. And yes, I’m aware that this video is amazingly ’90s.
If you want more info on this gigantic subject, we’ve written extensively in the past on codecs and know what you need to get to the finish line.
Check it out below:
Step 5: Fine-Tune Your Settings and Adjust Your Bitrate
Click the output name to specify an output name for the exported video file. To learn more about adequately naming a file, check out this article. Ensure that Export Video and Export Audio are checked, so the file has both video and audio.
If you feel comfortable changing settings to make them more customizable, you can do so in this window. Here are my recommended settings for most of my videos exported in Premiere:
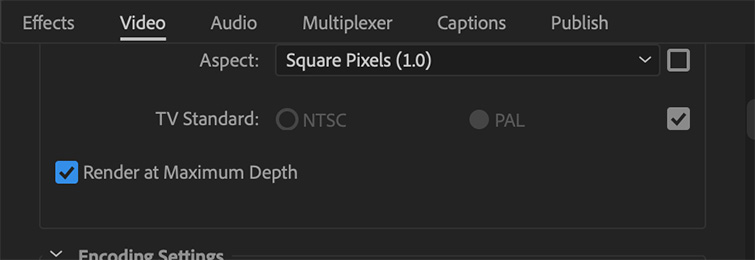
Click the Render at Maximum Depth box. This will increase your render time, but Premiere will take extra care in exporting your video in the cleanest way possible.

The bitrate decides how big your file size will be. If you need a small file size, you can trim down your bitrate to minimize size. For a master copy, you should export at a high bitrate to have the best copy you can export.
My regular export rundown is: Change the Bitrate Encoding Settings to VBR, 2 Pass, then drag your Target Bitrate to your selected file size. The size will be shown at the bottom of the window.
Make your Maximum Bit Rate double the Target Bit Rate. When you choose 2 pass, Premiere will run through your timeline twice to ensure that there are no corrupted frames and that your export is clean.
Before we move onto exporting in Media Encoder and the pros and cons of taking that route, I want to bring up one quick thing I’ve dealt with in the past—desaturated colors in your exported video as a result of exporting in Premiere Pro.
Why this happens mostly comes down to communication issues with what Premiere is reading and what your display is showing. So, if this has happened to you, there’s a quick fix in the form of a LUT you can apply in the exporting process.
Download this quick fix in the link below:
Step 6: Finish Your Export Either in Premiere or Finish in Media Encoder
Now, you can select one of two Premiere Pro export options: Queue or Export.
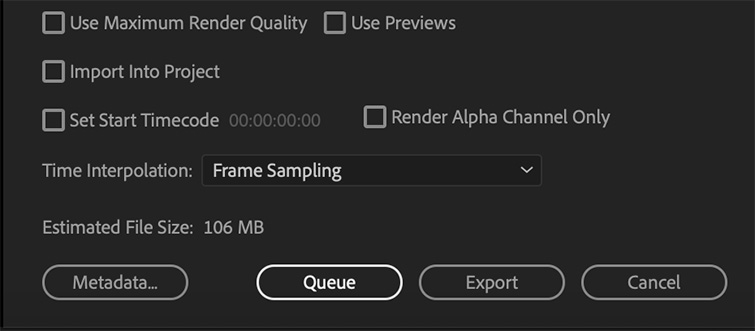
Selecting Queue will send you to Media Encoder, with the sequence added to a queue.
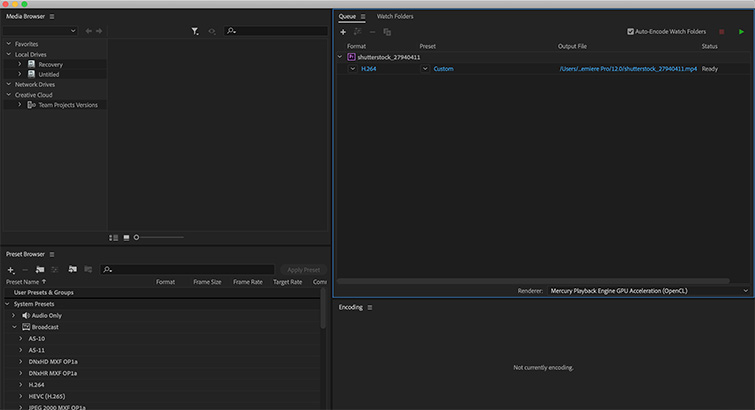
Then, all you have to do is press the green play button at the top to start the export. This is good if you want to add multiple Premiere Pro sequences to export at the same time.
This also allows you to continue working in Premiere Pro while Media Encoder exports in the background. This is the method of exporting I use most often, as I feel like Premiere has a harder time handling all of this at once.
Selecting Export simply exports the sequence right from that window. You won’t be able to use Premiere Pro while it’s exporting this way.
That’s it! You just exported your finished video.
Originally, this article was a breakdown of this video made by us. I replaced it with a quicker, more straight-to-the-point version (as seen above).
But, if you want to watch the original breakdown we made, here it is for you to enjoy below!
Also, are you sick of Premiere Pro? Was this whole process from start to finish the literal worst? Well, you’re in luck. Here are five cheap alternatives to Premiere Pro—with a full-on pros and cons list for your viewing pleasure.
Step 7: Save Your Settings for Future Exports
If you frequently use a custom setting, you can save your export settings as a new preset. Click the Save Preset button next to the preset drop-down in the export window.
You can then name the preset whatever you like. Now, you can use that saved preset in the future.
Want to streamline your exporting even more? As you can see, exporting a finished video from Premiere Pro is super-easy and customizable. You can also add additional output files from the same source sequence in Media Encoder—extremely useful for creating different file types and sizes of the same video.
Need a few more tips on using Premiere Pro? Check these out:
- 15 Premiere Pro Tutorials Every Video Editor Should Watch
- Quick and Easy Compositing Tips for Adobe Premiere Pro
- 15 FREE Camera Shake Presets for After Effects and Premiere Pro
- How to Properly Pancake Timelines in Adobe Premiere Pro
- The 3 Easiest Ways to Cut Clips in Adobe Premiere Pro CC
Cover image via BoxBoy.


